A Simple Modern Life

Living a simple, sustainable, modern life… with vintage flair!

Bathroom Paint-over: ALL DONE! July 27, 2014

Filed under: DIY — asimplemodernlife @ 12:33 pm
Tags: ,

Finally! I feel like I have been painting all week! Oh, wait… I have.
.
After painting the walls and cabinets, we tore off the shower door. The door was slightly broken anyway and I don’t like doors on showers. To replace it, we just grabbed an inexpensive, very short, shower rod, folded a vinyl shower curtain in half, and hung it up! I got the shower curtain over a year ago and have been hanging on to it. It was from CB2, and is the view from Brooklyn into Manhattan (when it’s all opened up and not folded in half). My husband was born in Brooklyn, so we kind of have a weak spot for Brooklyn-y stuff. 🙂
017 014
.
We literally ripped the door off, then there were just a few screws holding the frame in place on either side of the shower door opening. We unscrewed and removed the frame and viola! It was gone and found its new home in the dumpster! (Don’t worry, I did try to figure out how to reuse it, but to no avail. It was in pretty bad shape.)
015 014

013 012
.
We also grabbed a few hand towels and a bathmat in a bright teal to kind of go with the inside of the cabinets. It’s not the same exact color, but in this small town, it was the best I could do!
027 (2) 024
.
This is not a huge “reveal”, but it’s not a huge room. One thing it is, is a huge relief! Our daughters are so much happier. In the words of our oldest, Adia, “Now I don’t feel like I’m walking into a cave every time I come in here!”
So let’s see some before and after pictures of the “cave”:
Untitled-1 Untitled-2
.
We only spent about $25 on this bathroom mini makeover paintover. It looks so much better, brighter, and fresher!
.
What are you waiting for? Go paint something!
.
LIVE SIMPLY AND CHANGE THE WORLD!!


Bathroom Paintover- cabinets July 26, 2014

Filed under: Design — asimplemodernlife @ 5:49 pm
Tags: , ,

This week has been all about painting! There is hardly a surface in the girl’s bathroom that has not been touched by a paint brush this week.
.
So you’ve already seen the walls’ transformation, now take a look at the cabinets!
.
We wanted to use what we had, brighten up that windowless room, and update the overall look of the bathroom. That is why we used the super light aqua on the walls and white for all of the trim, cabinets, and woodwork in there. On the inside of the cabinets, though, it was all fun.
That’s right BRIGHT teal! 🙂
Not only was it a $7 gallon find in the mis-tint section of our local hardware store, but it was also the perfect fun, bright compliment to the wall color! Win-Win!!
.
While the outside of the cabinets were done in white, the inside is where the punch of color happens! (kind of like I did here with my West Elm knockoff dresser for our room ) I do love an unexpected pop of color here and there. It helps to keep life interesting and every time you open the cabinet, drawer, whatever, you can’t help but smile a little bit.
.
I always like to do the cutting in, or edges, with the paint brush first, then do the roller. It seems to look better that way. So that’s exactly what I did here, after I removed the shelves from inside; brush then roller, brush then roller.
005 004
.
Then I propped the cabinet shelves and doors up on paint cans and started rolling paint onto both sides of the shelves and just the inside of the doors.
006
.
This part of the process went very quickly and very well! Don’t you just love that? Although I did realize that one of my “painting shirts” has gotten a little too old and thin to be used anymore. My stomach looked like a picasso when I took it off!
.
The last step was to flip the doors over (once the teal was completely dry) and paint the outside of them white and viola! Pretty new cabinets!
008 009
.
After I put the shelves back in, I let the paint cure for a day before setting anything on it. That way the items wouldn’t get stuck to the paint and leave marks.
007
Isn’t it puuuuurdy? 😀
.
Last week I went through the clothes that we had put away for the girls to grow into (hand-me-downs). There will be a post about simplifying children’s wardrobes coming up, but long story short, I purged, and got all of the hand-me-downs into 5 large Ikea Kassett boxes. Since we have oodles of storage in their bathroom and not a lot of things to actually store in there, I decided that the cabinet behind the toilet would be the perfect place to store clothes yet to be grown into and the guest towels! I am so smart.
Well…
at least that’s what I like to tell myself.
010
Their toiletries are stored in the cabinet above the sink and the towels and washcloths are stored in the one below the sink.
011
.
I had some leftover cabinet hardware from a previous project, so I decided to put one of those on each cabinet door. The two doors for the cabinet behind the toilet already had hardware pulls on them, but the two around the vanity did not. If you want to put a knob on a door that doesn’t have one, just drill a hole and viola! Instant update for cabinetry!
.
Adia and I reattached the mirrow to the front of the cabinet door above the sink and put the doors back up. I also went over the screws in the hinges with a bit of white paint once they were all back up, so they wouldn’t stick out like a sore thumb.
Hmmmmmmm. Do you ever wonder where certain expressions came from?
“Like a sore thumb”…………..
Untitled-1 012
.
So here’s the finished cabinets! I am so thrilled that our children will be out of our bathroom and back into their own!
023 024

025 026 (2)

027 (2)
.
Stay tuned for tomorrow’s post, when you see the completely finished downstairs bathroom! 🙂
.
LIVE SIMPLY AND CHANGE THE WORLD!!


Bathroom Paint-over: Walls July 22, 2014

Filed under: DIY — asimplemodernlife @ 5:02 pm
Tags: ,

Just like in the last post that was about being sick of looking at the ugly backsplash in the kitchen for the past year, this post has some “sick of looking at it” qualities.
.
You may well remember the horror you felt when I posted the house tour a couple of months ago and you got a first look at the downstairs bathroom that our 3 daughters share. Just in case you don’t remember, prepare to be horrified again:
026 027
Sorry to do that to you, but I did warn you that it was horrifying! I am thinking that this is what Freddy Kruger’s bathroom looked like.
A bit dramatic?
Yes.
but it gets my point across.
.
Since we’re all friends here, I feel that I can tell you that due to my husband’s job, we might be moving within the next year. God only knows where we’ll be next!
What does this revelation have to do with the girl’s bathroom? Well… let me tell ya!
.
We were planning on GUTTING their bathroom this fall, reconfiguring and replacing pretty much everything in it. But now with this possible move, it seems like a bit of overkill. I don’t want to spend boo-koo bucks on a full on remodel when we might move soon after it’s finished. Call me cheap, call me lazy, or, as I like to think of it, call me smart.
.
That being said, that bathroom really is tough on the ol’ eyes. Not only is purple the only color I hate, but the paint job is really shotty, the dark 1980’s oak wood tone is dark and depressing in a room with no natural light, the shower door is broken, and the faucet looks like it’s been around the block 8,000,000 times. The only thing that is in good shape is the linoleum on the floor!
.
If we do move, we’ll sell this house and I don’t want the new people coming in here and thinking that same thing that I thought when I saw that bathroom, wow, this is hideous and will be a lot of work. And even if we end up staying here for another 10 years, I am so sick of looking at that bathroom right now!
.
We didn’t really want to spend a lot of money on the “pre-model”, so we decided to use leftover paint from Adia’s room. It is a nice seafoam green kind of color (Air.05 from YOLO Colorhouse) and we thought it would really brighten up the bathroom. So we scrubbed the walls, removed all hardware, bathroom paraphernalia, and cabinet doors, and got to work! (while some Casting Crowns ans Adele cheered me on from my iPOD)
.
My paint roller was movin’ and shakin’ and I made quick progress! But after 2 coats of paint with the roller, I looked down into the paint bucket and realized one scary thought; there wasn’t enough paint left to do the cutting in around the edges. So everything was sea-foamy green with a jagged lavender border. It looked worse than when I started!
027 026
.
I do love projects that go off without a hitch, but I also love the forced creativity that mistakes and problems bring. I like to think of it as a challenge.
Or I just sit in a corner cry about it, but challenge sounds better.
.
I decided to tape off a 2 inch border around the top and bottom of each wall, making a moulding of sorts, and paint it white.
028 029
002
.
When I took the tape off, it didn’t look horrible so I did a happy dance!
*********happy dance*********
closeup
.
I also painted all of the dark wood white. So this is where we currently are:
008 007
.
It looks better already, right? Well, I must get back to work now. I am on a painting roll! I should be done by the end of the week, so stay tuned for more bathroom beautification.
.
LIVE SIMPLY AND CHANGE THE WORLD!!


Just sick of looking at it! July 19, 2014

Filed under: Design — asimplemodernlife @ 5:39 pm
Tags: , ,

There are big plans for our kitchen. Big plans that will take time and money to complete. Other than painting the walls, adding some open shelving (link here), and installing a dishwasher (links here, here, and here) and water filtration system under the sink, the kitchen remains untouched and as ugly as when we moved in. The cabinets are faux 1980’s blonde “wood”, the backsplash is tin tiles glues to the wall and faux painted a weird bronzy color, the countertop is not only not pretty, but it is messed up in some spots, and the floor… mauve diamonds on vinyl are still hot now, right?
Oh wait, no.
NO, they’re not.
.
While we do not have the time or money right now to do a complete overhaul of the kitchen, we can do something about some of it for the time being. First came the painting the backsplash and adding a no-sew window treatment. Enter a quart of bright yellow semi-gloss paint purchased from the “mistints” at a local hardware store and 2 awesome lemon-y dishtowels from Crate&Barrel.
.
If you haven’t already noticed this, I like to bounce around the rooms in my house. I very rarely complete an entire room’s worth of projects at once. I envy those who can do that, and I have tried, but I just keep bouncing around doing things here, there, and everywhere. It keeps me happy and lets the rooms evolve slowly over time. Sometimes what I think I want to do in the beginning ends up changing as time goes on, so I guess it’s good that I bounce around, huh? Today’s bounce is to the kitchen!
.
This is the kitchen “before”, on move in day. It looks so dark and dismal in there, and we were just sick of looking at it!
023 backsplash (3)
.
I cleaned the backsplash really, really well. Paint won’t stick to dirty or greasy surfaces and, while I am a clean person, there’s always little bits of dirtiness in the kitchen! Then I painted about 4 or 5 coats (I lost count in all of the excitement!) using an angles brush and a small foam roller. You know, the cute little baby paint roller? LOVE those. It’s actually a bit sad how much I love those.
The first coat was pretty thin and I was worried that the paint wasn’t going to cover it, but in the end, it all worked out!
backsplash (6) backsplash (7)
backsplash (10) backsplash (4)
Tah-Dah!!
backsplash backsplash (2)
.
Now, for the really simple valance for the kitchen window. All I did was use fabric glue to glue pieces of the second towel onto each end of the first towel and then draped it over a cheap curtain rod. This was a “Sicilian Lemon” towel from Crate&Barrel last year. It’s no longer available, but there are lots of others that are awesome! I am not a towel expert, so I’m not sure what the weave of this particular towel is called, but it’s not fuzzy or a waffle weave. It’s flat. It kind of reminds me of canvas fabric. Anyway, it took me about 20 minutes tops to do and looks awesome!
backsplash (9) backsplash (13)
backsplash (14)
.
With the bits of leftover towel, I made a small pillow that will eventually adorn the storage bench I plan on building to go under the open shelves in the kitchen.
backsplash (8)
Right now it just sits on my desk chair. Which I found by the side of the road, by the way. You know me and my garbage! Isn’t it awesome? After a thorough cleaning and conditioning (no, I did not move on to my hair, I’m still talking about the vintage office chair) It completes my office nook so nicely, and is super comfortable to sit in. In fact, I’m sitting in it right now as I am typing. 🙂
backsplash (12)
.
The kitchen is a little bit brighter and I am loving it! The best part? It was all done in an afternoon. I just love projects that are over quickly and have no problems that arise.
Eventually I would love to have some yellow penny round tiles for the backsplash like these:
yellow penny rounds
but that will come in time. 🙂
.
LIVE SIMPLY AND CHANGE THE WORLD!!


The Purge: Paper Edition July 15, 2014

A couple of weeks ago, when I started, what I like to call, “The Great Purge: My Foray into Minimalism”, I began with what I thought would be a pretty tough challenge, even though it was a small space: my closet. You can see the 35 hanger closet in the first post, “the wardrobe purge“. Going through the clothes and accessories was a fairly easy thing for me to do (except the earrings… those were hard). Going through the rest of this crap? Yeah… NOT so easy.
.
I don’t know about you guys, but I keep all of my most personal possessions in my closet. My wedding dress, mementos from my past, kid’s artwork and schoolwork, things I want to some day do, things that I basically don’t need on a daily basis. Now while die-hard minimalists would just say get rid of it all, I can’t do that. Will I someday? Who knows.
Do I need any of it?
NO
Do I want to keep some of it?
YES
.
The process that this post goes into took about 5 or 6 days, going through everything over and over again in order to keep whittling it down. Plus, I had gotten rid of quite a lot over the past couple of years anyway. My high school pins, awards, etc., my teenage journals, the shot glass candle from my prom, the guest book from our wedding, and stuff like that never made the trip to Colorado from Hawaii. I mean, come on. Do you ever use that shot glass candle? Or your high school “letter”? Does it enrich your life or would a picture of it be just as good for bringing back the memories associated with that item?
.
The hardest part for me was throwing something away that one of my children made. At one point in time during this process, I had to stop and just go be with my kids, to prove to myself that I was not a horrible mother or something. But, I can honestly tell you that a couple of weeks later, I haven’t missed, or regretted getting rid of, one single item. I feel happier when I go into my closet, not saddened. I feel free!
.
STEP 1: Kid’s Papers and Photos
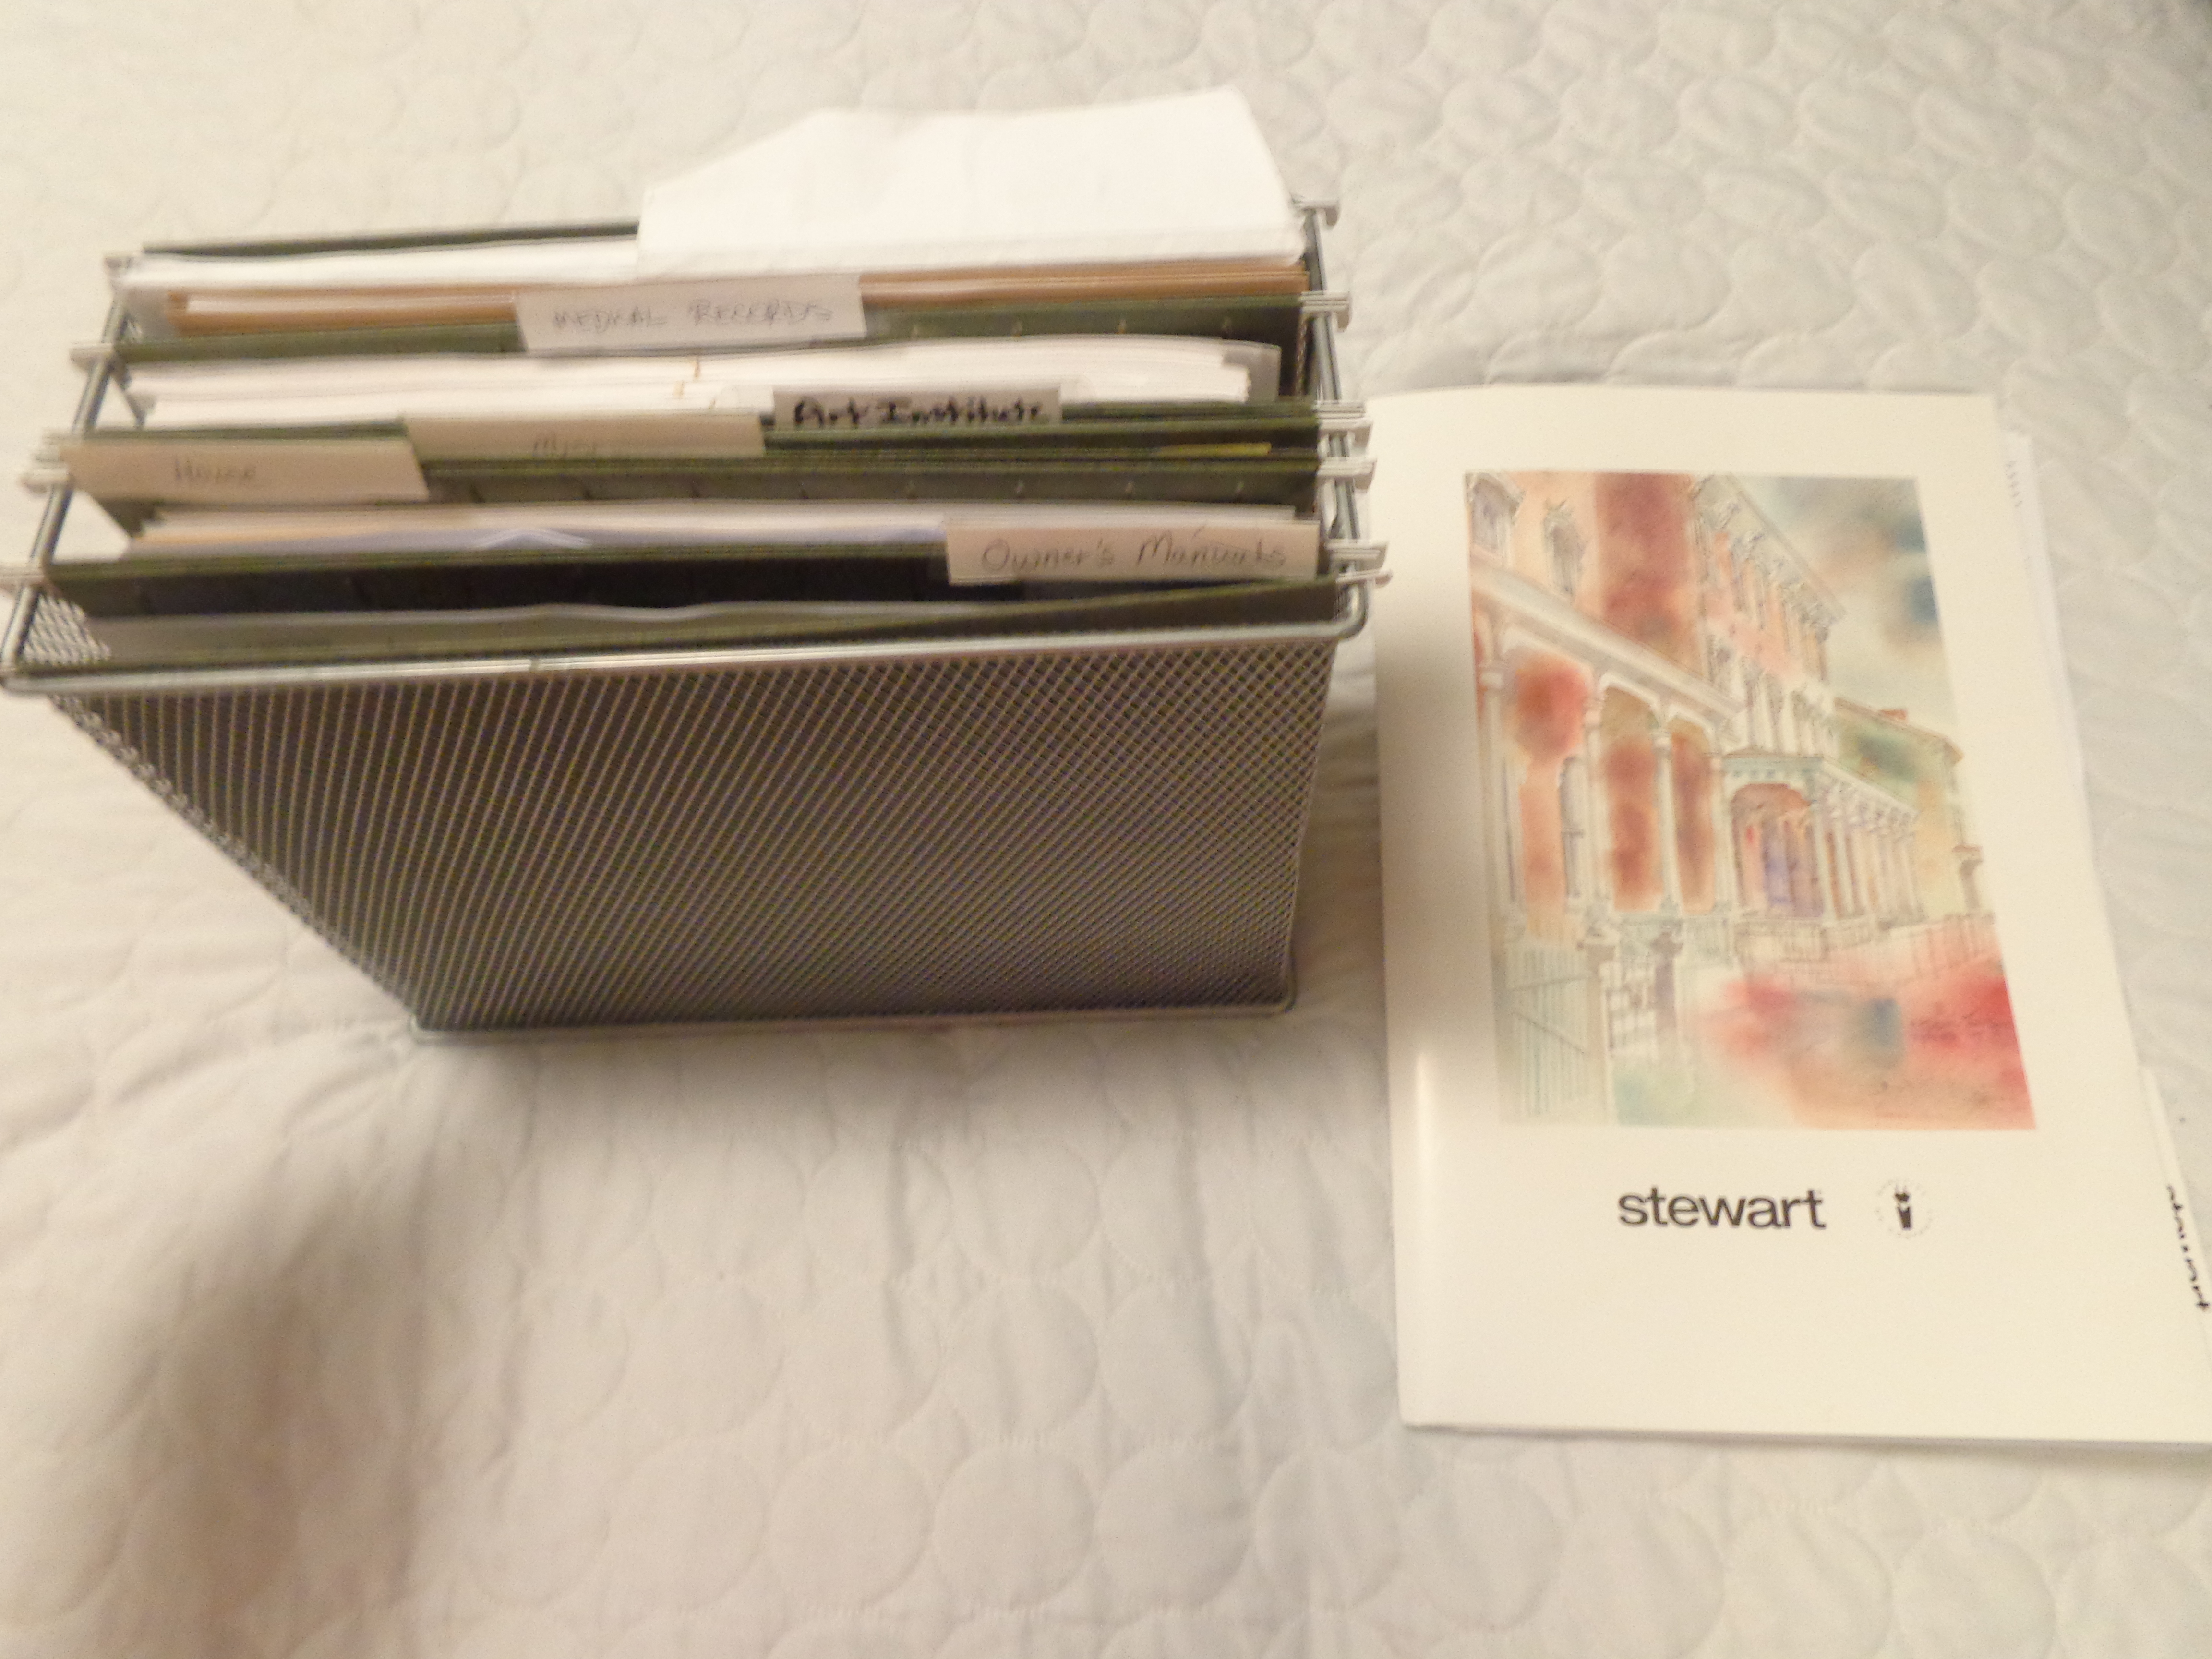
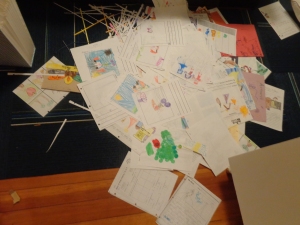
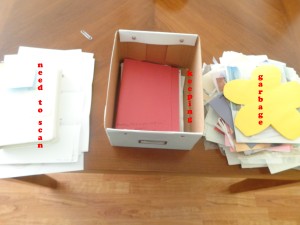
OK, so this is what I started with:
memento purge
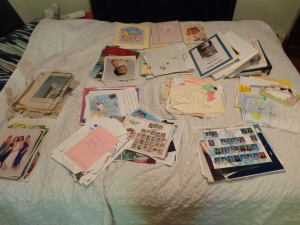
Yeah… it was pretty bad.
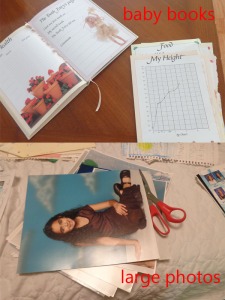
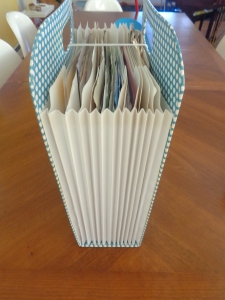
I started out by trimming all of the kid’s large (11×14) photographs that I used to have hanging on the wall throughout the years down to 8×10’s so that they could all fit in the accordion file I was planning on putting them in. I also decided that their baby books were wasting space. Now, before you freak out on me, hear me out. NONE of their baby books were ever completely filled/finished anyway and I had made each of them a scrapbook of their first year which I did keep. I tore the pages that I wanted to keep out of the baby books and put them into their scrapbooks.
Untitled-1 memento purge (6)\
And here is the huge pile on my bedroom floor of garbage. it was 2 inches thick in the center!
memento purge (3)
.
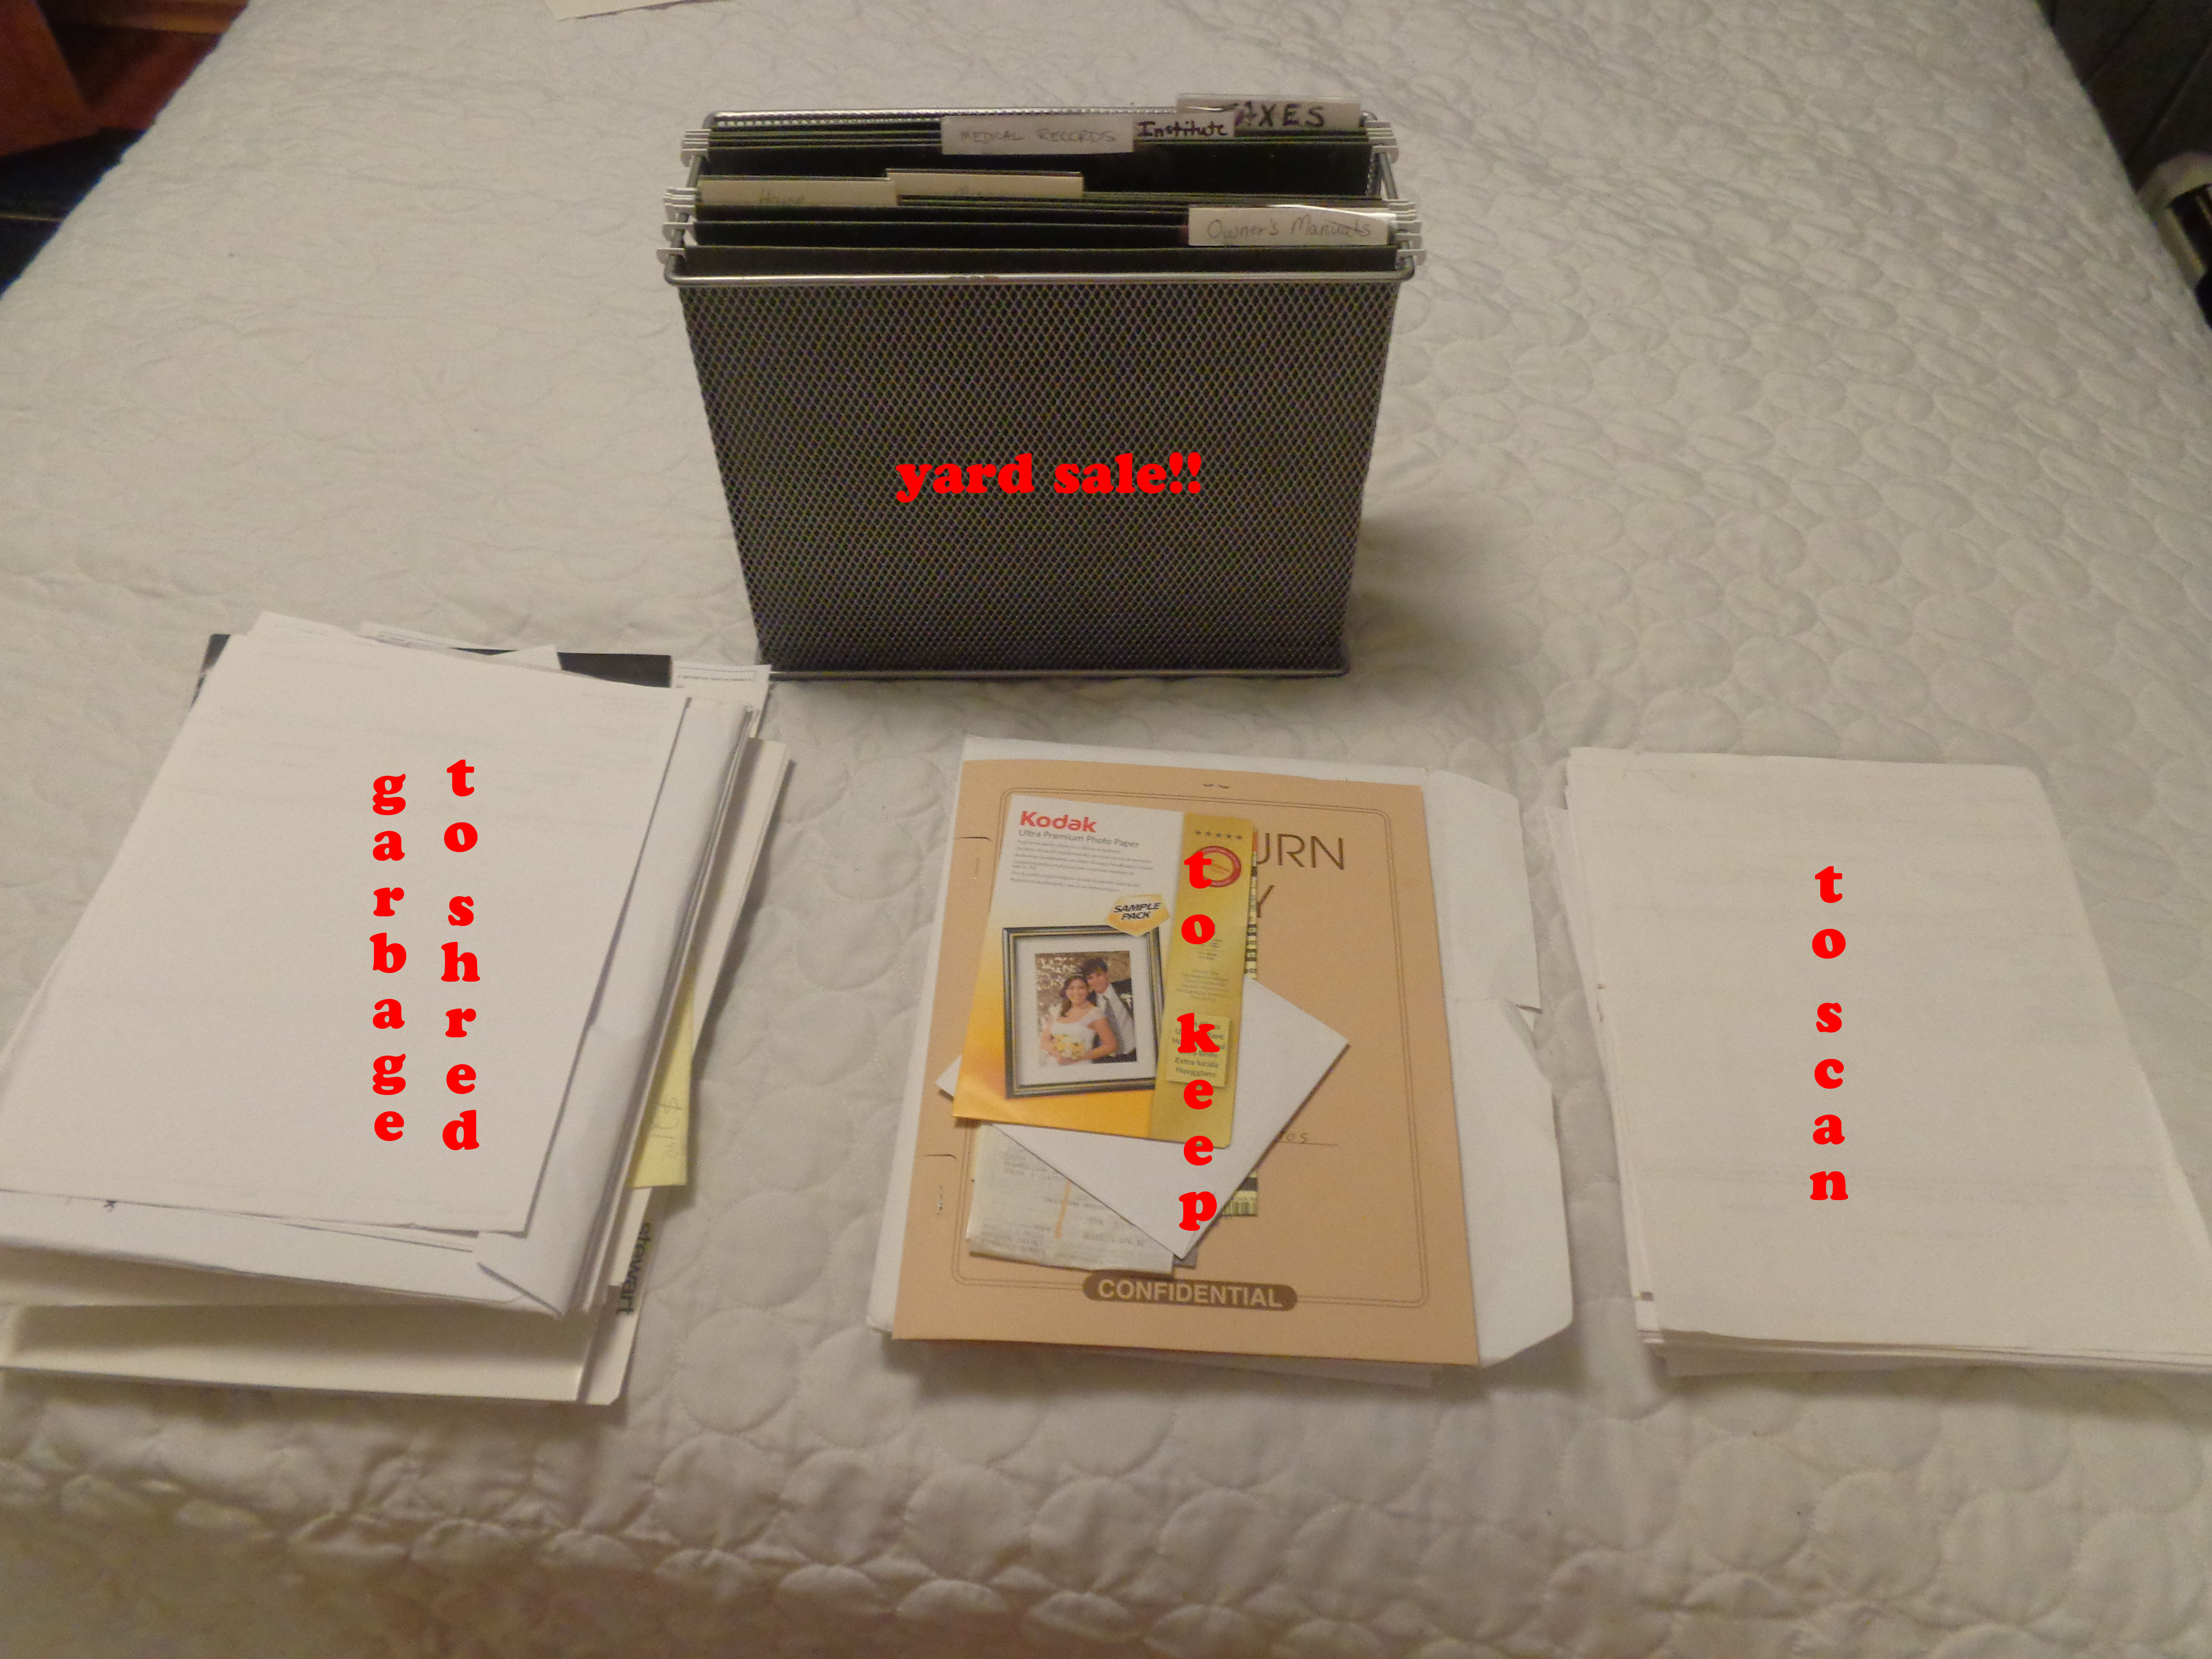
Fast forward a couple of days, I still thought I could get rid of more… get rid of the entire accordion file!
I went through everything again and decided a couple of things.
1.) I don’t need to keep 8×10’s. I am never going to hang them up on the wall again, and if the kids want pictures of themselves as kids, they won’t want a huge one.
2.) Unless it has a hand print on it (to show their size) they don’t need the actual pieces of artwork or schoolwork that they made. They will just want to see it.
.
The logical conclusion (give me a Spock moment here) was to scan everything into the computer and only keep the hand print artwork, which I put into their baby books. The biggest saving grace was to keep only 2 or 3 pieces of artwork and 2 or 3 pieces of schoolwork, per child, per year.
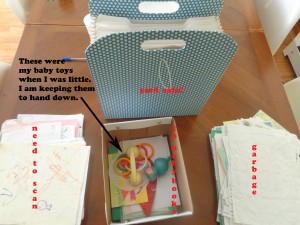
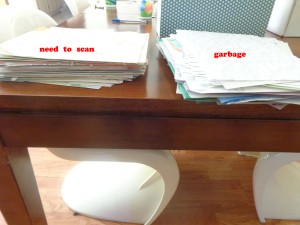
So after the second go around, the accordion file went to the yard sale pile, the hand-print artwork went into the baby books, a bunch more got thrown away, and I am still in the process of scanning the rest into the computer (which I will back up on an external hard drive). And, as you can see in the first picture below, I kept my 3 baby toys. Each of my kids used them when they were babies, and as you can see, 3 toys, 3 kids, it all works out! Each of my children will get 1 toy when they have a child.
memento purge (14) memento purge (15)
.
STEP 2: Personal Mementos
As I stated earlier, I had already gotten rid of most of my personal mementos when we moved to Colorado. All I had left was everything my kids had ever made specifically for me, cards form our wedding and certain holidays that people had given to me, the letters from my husband from each time he was away at war, and a few other things. I went through everything anyway, it was time to minimalize, baby!
.
I kept some of the things my kids had made for me, but not all. I can’t really describe how I decided what went and what stayed, it’s very personal… I just did it. As for my husband’s letters, I kept all of the handwritten ones from his first couple times over there, before they had computers, and decided to scan the printed out emails that I had. After all, they were only print outs, I was just turning them back into their electronic form.
memento purge (13)
.
STEP 3: Paperwork
I used to have an actual file cabinet full of paperwork. Pad bills, old taxes, and tons of other stuff that I can’t even remember. I had gotten rd of most of it before we moved from Hawaii, but I still had a small file box full of crap. Yes crap!
This step was waaaaay easier than the previous 2 since I wasn’t emotionally connected to old bills and papers. By the way, just for your own reference: taxes are to be kept for 3 years (in the U.S.), you do not need your receipt for your paid electric bill from 1999 or from last month (if you paid with a check or online with your bank account, you can easily prove that), all of the paperwork from when you bought your house is public record, you do not need a copy (except the actual title, don’t get rid of that!). Most of the things you want to keep can also be scanned and kept electronically. Most companies/agencies will accept those just as well as the originals, as long as it’s not a signed, notarized document. Most of the time we email people the documents anyway, or send them a copy. They never even see the originals! These are just my personal opinions and are in no way professional legal council. Do your own research, if you are unsure about something. (sorry, but I’ve got to cover my but, there are some mean, crazy people out there!)
memento purge (9) memento purge (10)
.
STEP 4: Misc.
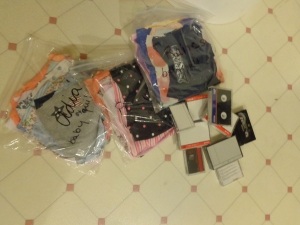
This step is for all of the other stuff that just kind of hangs out in the deep void that is was my closet. For instance, I still had about 25 8mm video cassette tapes from our first and second camcorders. While there are some things on those tapes that I would like to digitalize, it costs $30-$50 per tape to have the video retrieved and digitaized. I had kept these tapes thinking that would eventually do just that, but let’s face it, I am not going to, so it’s time to let go. I don’t have any videos of me as a child and I turned out pretty ok. (well, that could be argued, but…). I also got rid of some baby clothes from my kids that I was saving. I was thinking of making a quilt for each of them out of the baby clothes when they had kids, but I don’t quilt, and they’re not overly sentimental people. I am sure their life will be none-the-poorer if they don’t get a handmade quilt from their mom. I als got rid of the rag rug. (gasp) I was truly honest with myself and figured that it was never going to get finished. It has been a year!
memento purge (7)
.
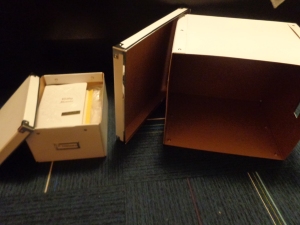
I went from a medium-sized Rubbermaid container to a large white Ikea storage box to a small white Ikea storage box for all of my personal mementos and miscellaneous stuff.
memento purge (8)
.
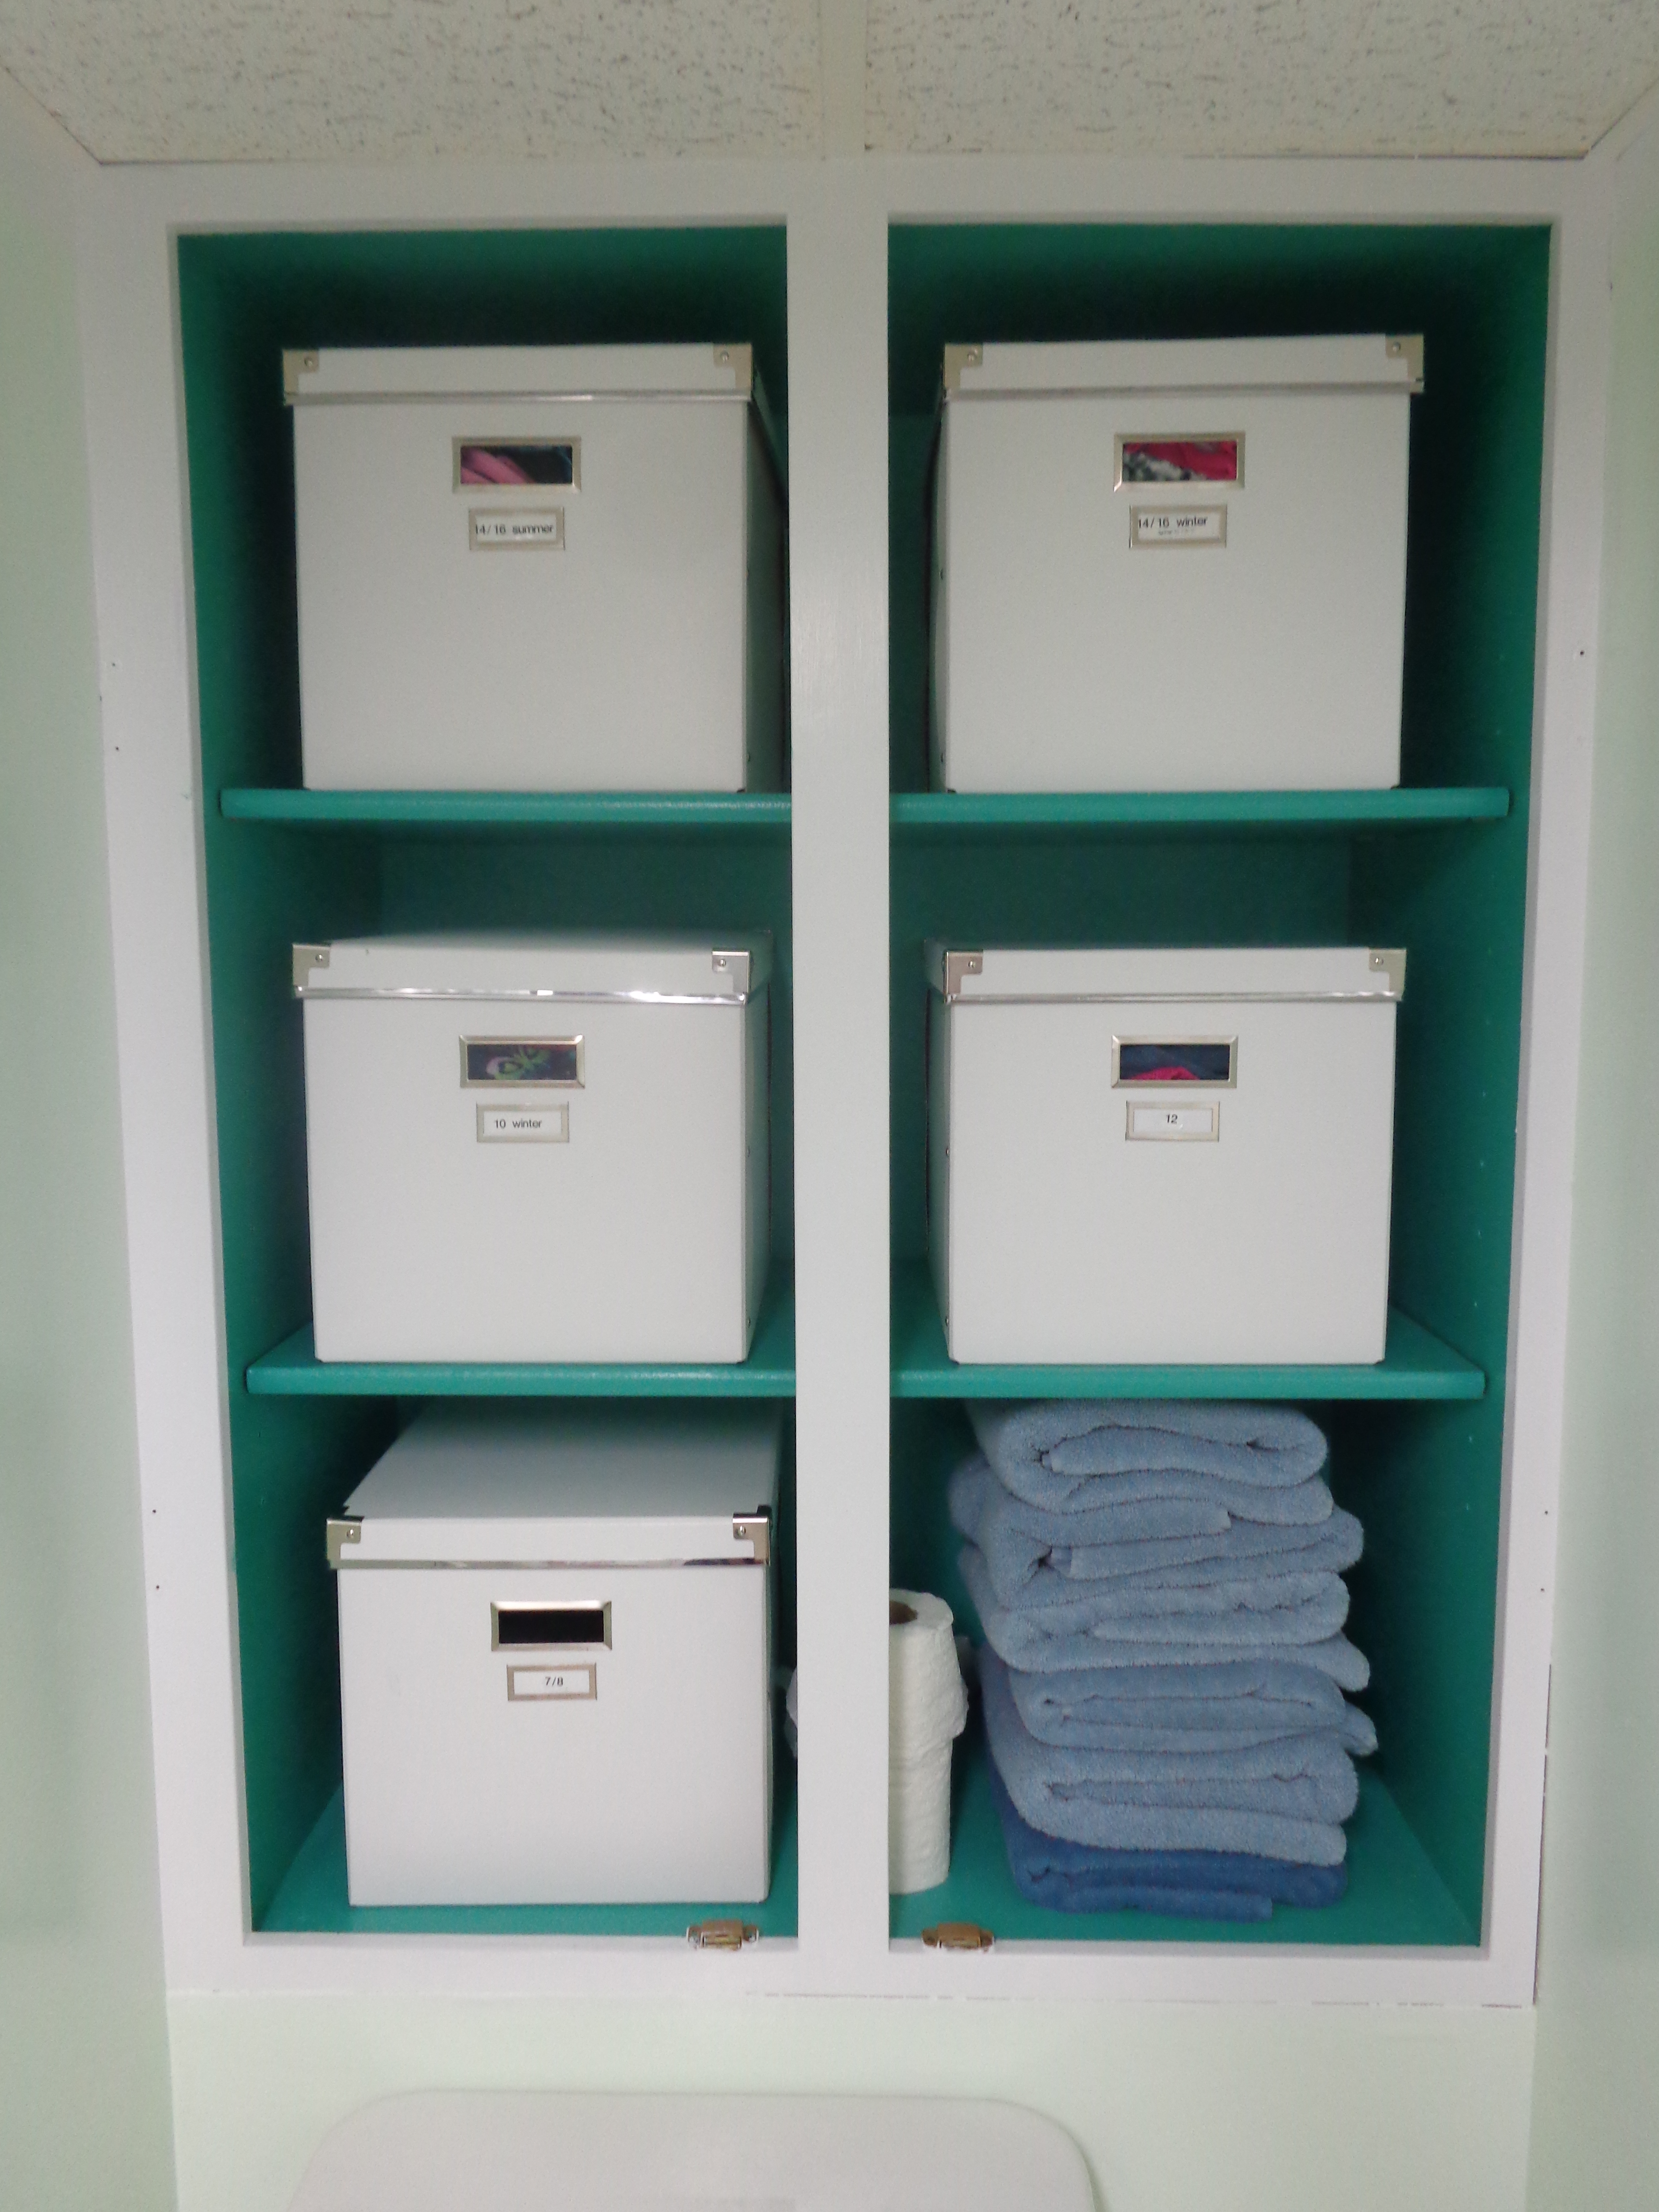
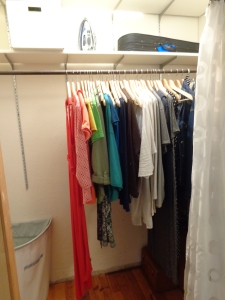
This is my closet now, with everything that is in it labeled:
(the small, white Ikea storage box full of my personal mementos is in the empty drawer under my bed that I cleaned out during the wardrobe purge)
closet after
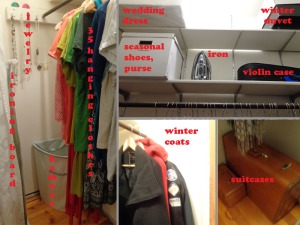
(Yes the cool vintage luggage set still has the key and the locks work! SCORE!!)
I have my 35 hanging clothes, everyone’s winter coats, my luggage set, the down duvet we use during the winter, my preserved wedding dress (which is one the “get-rid-of-it” fence), an iron and ironing board, the hamper, my jewelry, my daughter’s violin case, and an Ikea storage box with my winter boots/shoes and 1 extra purse in it.
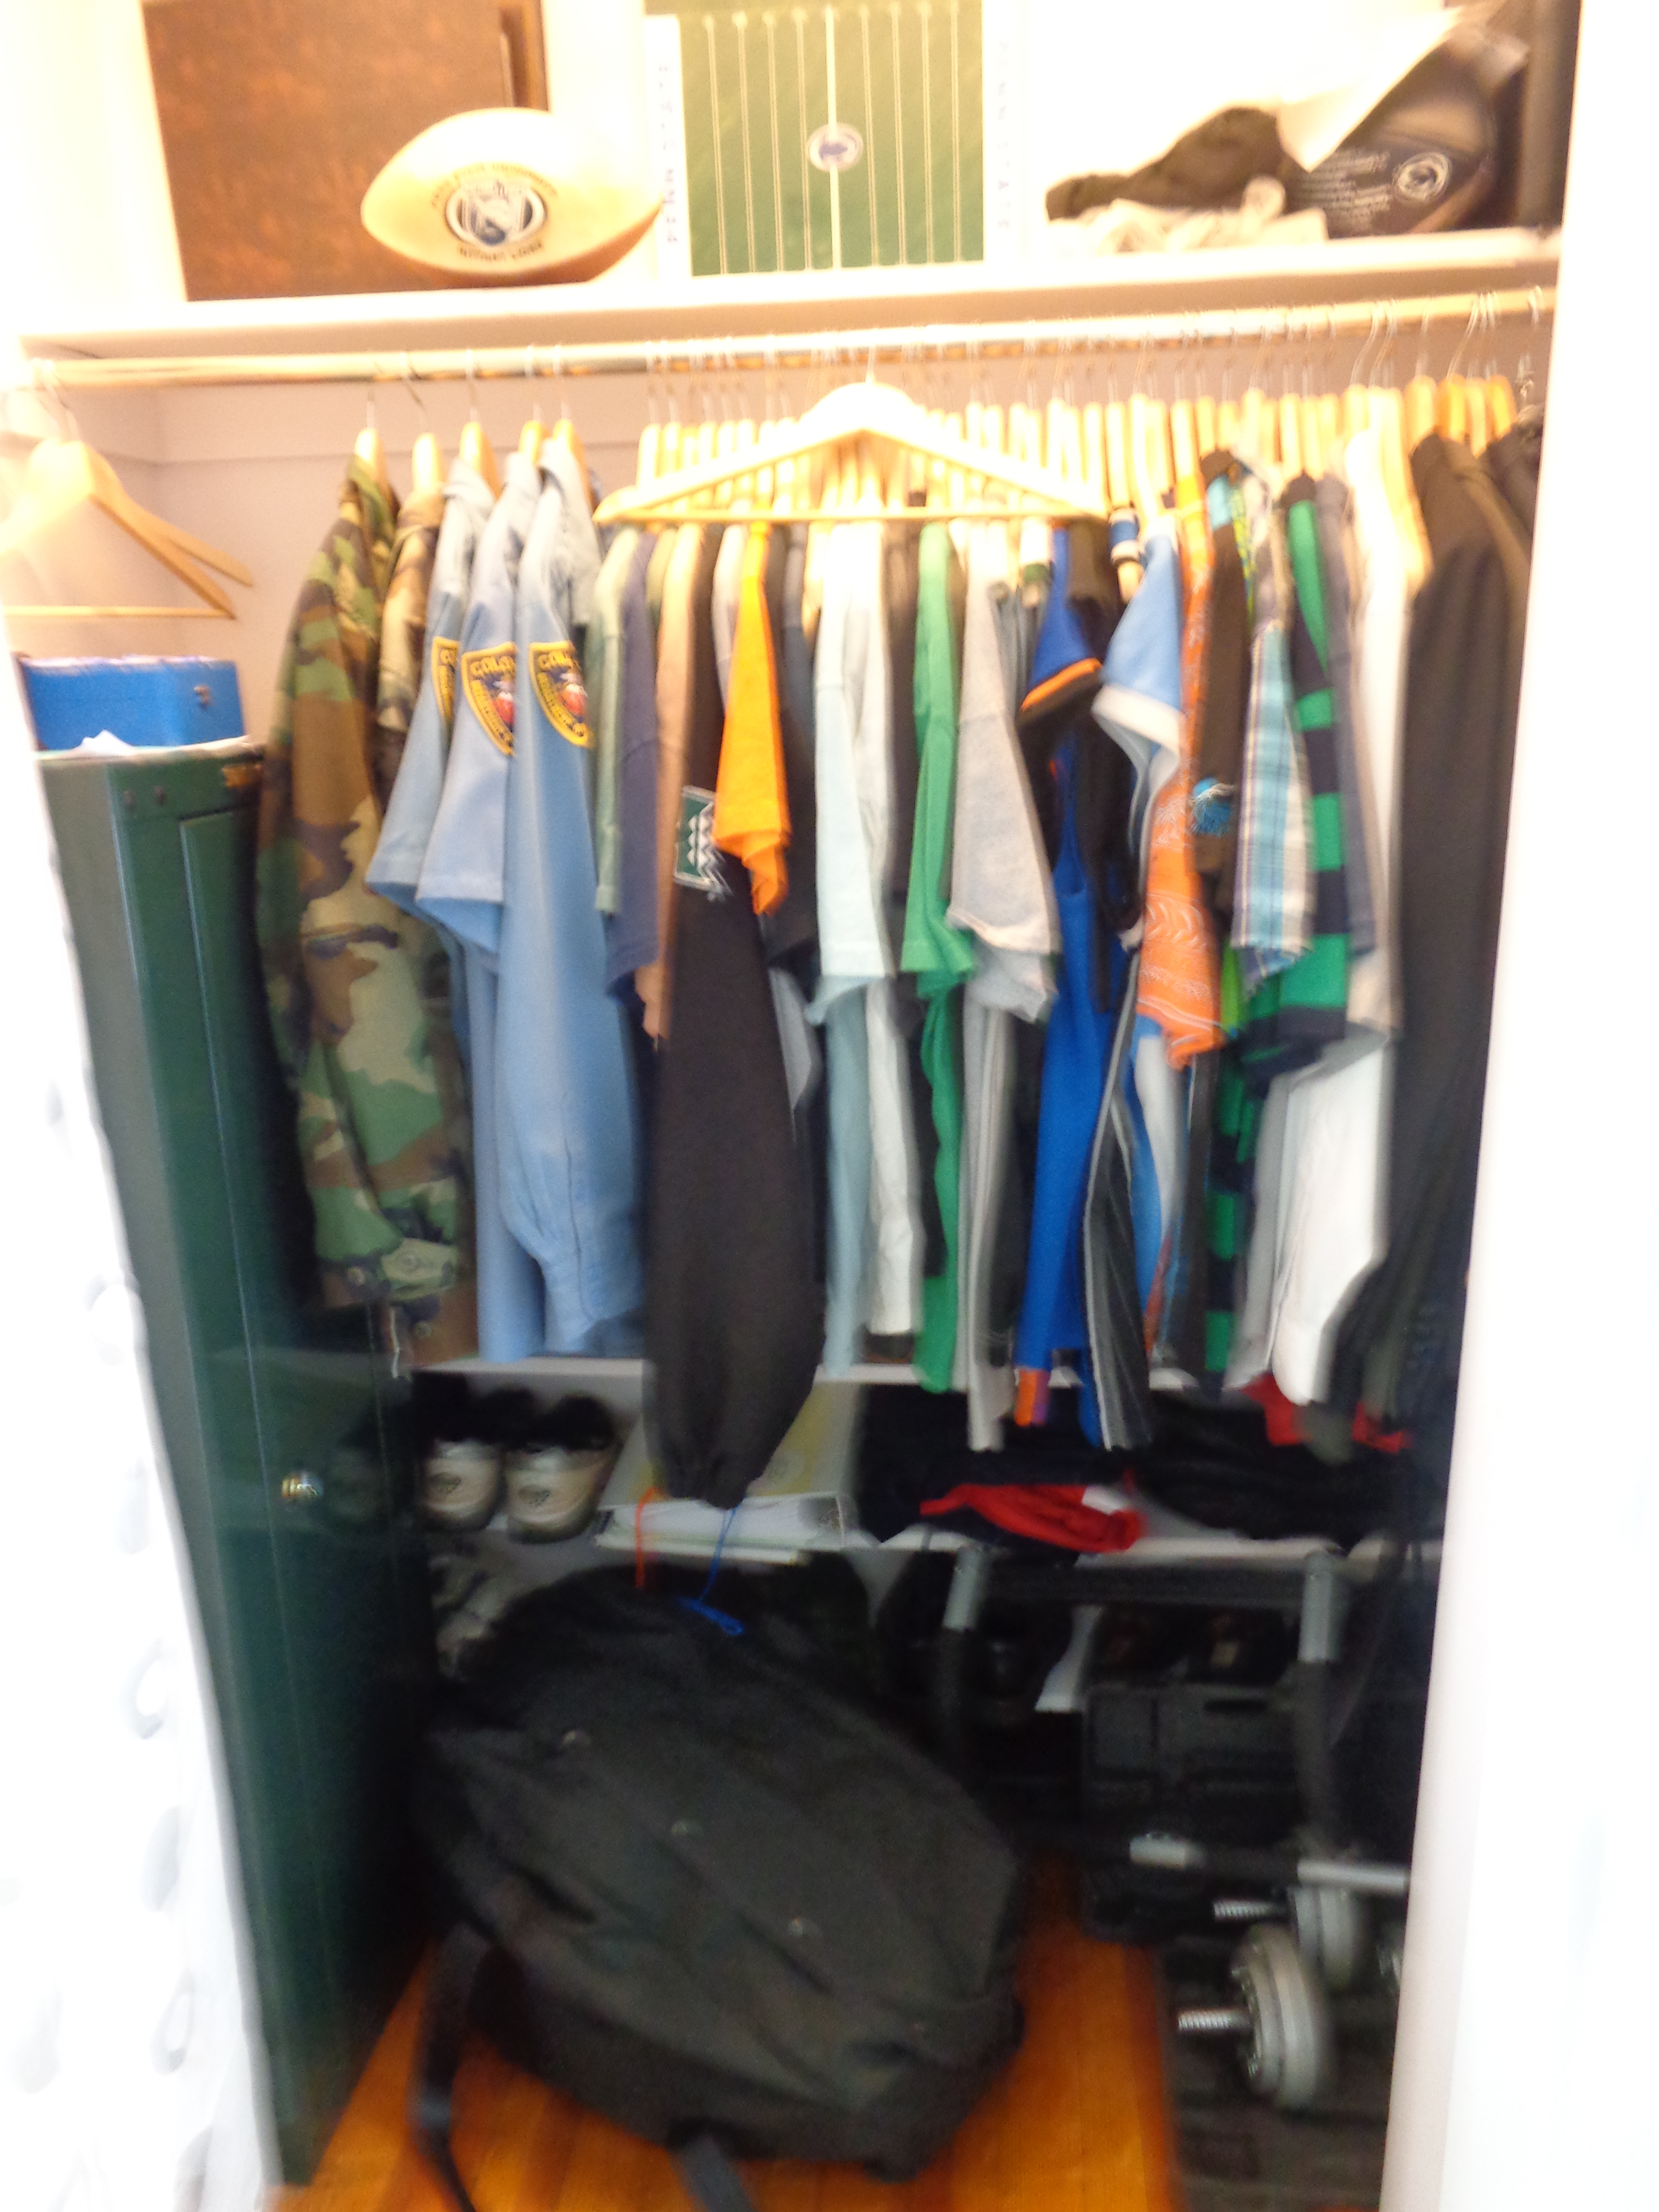
While I did not take a “before” picture of my closet, here is my husband’s closet’s “before”. Mine looked pretty much the same, just with girlier stuff. Then there’s my closet now, which causes me to feel peaceful and calm instead of stressed out every time I look into it.
020 022
.
Phew!
This was a long post, and I’m sorry if it bored you. I did this not to tell everyone what they need to keep and what they need to get rid, but because when I was thinking about doing this I couldn’t find any information about anyone’s processes and thoughts. It’s kind of nice to see inside someone else’s head sometimes. Everything I found online just basically said “get rid of stuff”. Well… yeah… but where do I start? It can be daunting to start paring down life and I hope my thoughts and discoveries about what’s important to me help someone out there in their journey to a simpler life.
Good luck!
.
LIVE SIMPLY AND CHANGE THE WORLD!!


The stairs are done! July 12, 2014

Filed under: Design,DIY — asimplemodernlife @ 2:00 pm
Tags: , ,

Yep, you read that post title correctly, DONE! You really have no idea how happy I am, how liberating it is to have these stairs finally finished! 7 months we have lived with unfinished ugliness, but NO LONGER!
.
After I finished taping off the diamond pattern on the stair steps, I got my handy-dandy yellow floor paint and the non-skid additive I had purchased, over 7 months ago, and mixed them up in an old cool whip container.
001
002 003
.
Then I got out my little roller, which I think is utterly adorable, and put 5 coats of the gritty paint mixture onto the stair steps.
005 006
.
The only problem that I had with this process is that the pencil lines from my grid were a bit hard to cover over with the paint. If you decide to do something like this, use a Magic Eraser (which truly is magic) and remove the pencil lines before painting. You can still see some of the pencil lines left over from the grid I used to make the diamond pattern on the white parts. 015
I am planning on “erasing” them as soon as the yellow has had a chance to really dry and set properly. The last thing I want to do is rub off the edges of the yellow diamonds and have to do this again!
.
Here’s the final product:
014 013
.
I LOVE IT!
The original plan was to add some lines on each edge of the diamond pattern to make it look like a true runner like this:
016
but once we saw it, the hubby and I both agreed that it looked awesome as-is.
.
We kind of like the “runway” look it has from the top of the stairs; like arrows leading you down. We also like the fact that it doesn’t look exactly like a traditional runner, but has a bit of a “funky” feel to it.
.
What do you all think?
I think that it definitely earned the term “funner”. 🙂
.
LIVE SIMPLY AND CHANGE THE WORLD!!


Episode 1!! July 11, 2014

Filed under: Living Intentionally — asimplemodernlife @ 4:55 pm
Tags: ,

I have great news! “Tiny House Nation’s” first episode IS available to watch online at FYI’s website!!
(link here)
Here’s a little sneak preview/ spoiler: tiny house
.
MY enthusiasm was through the roof, people, but my husband was a little more reserved. OK, a LOT more reserved, but I made him watch it with me anyway. 🙂 It was amazing! A family of 3 moved from their 1300 sq. ft. house into a 172 sq. ft. tiny house. While he and I agreed that we would never go that small, it was very interesting to see the amazing space-saving ideas implemented in such a tiny home.
.
Luis’ favorite was, of course, the ceiling mounted, swiveling tv. My favorite was the princess loft. Watching this episode has also made us all the more sure that we want to get rid of more of the “stuff” that is weighing down our lives and that we really want to downsize the size of our home.
.
To update you all on our current progress; we are purging and re-purging many areas of our home and the kids are totally on board.
.
We are not pushing our kids into getting rid of anything. While we have always maintained a rule that states, “if it doesn’t fit on your current shelf or in your current toy storage solutions, then you need to get rid of some stuff”, there still seems to be a lot of extra toys/little crap in our house. The girls have seen me going through my own things, have asked me why, and have engaged in “less is more” conversations with me. They have also been fascinated with the tiny houses on YouTube and the like. It didn’t take them long to realize that the house has been less messy lately and they’ve had to do less chores. All of these life lessons have encouraged them to go through their own belongings quite thoroughly. While I did implement a 30 hanger maximum for each of my girls, for this season’s clothing (after my “35 hanger closet” exercise for myself, including all of my winter and summer clothes), I did not tell them to get rid of anything else. They keep bringing bags and bags of stuff up, all by their little lonesomes, to go into the massive, ever-growing yard-sale pile that has taken over one whole bay of our garage! (this is after we donated an almost full van’s worth of stuff!) Kids are surprisingly eager to get rid of their stuff, get the money from it, and use it to do more fun things and enjoy life.
.
Soon, you will get to see a picture of everything that we have gotten rid of. The huge yard sale is in August. 🙂
.
Until then, keep rethinking your life! What can you do without that is taking precious time, money, and energy from you?
.
Also… WATCH EPISODE #1!!!! 😀 And then tell me all the space-saving tips that you implement, or just cool ones that I haven’t heard of.
.
LIVE SIMPLY AND CHANGE THE WORLD!!


“The Taping of the Stairs” July 9, 2014

Filed under: Design — asimplemodernlife @ 7:52 pm
Tags: , ,

For those of you who are Shakespeare fans out there, do you get the title of this post? 🙂
The Taming of the Shrew” is one of my absolute favorite plays EVER!
.
Yes.
I am a corny dork.
And I am perfectly OK with that.
.
Back to the post at hand, STAIR PROGRESS!!
The first post about the stairs where I gave them a nice coat of plain white floor paint can be found here. But now it’s on to slightly more exciting pursuits. Taping off the design that will be the faux, painted runner.(“funner”, if you will)
.
You all voted, both on here and on Facebook, and design #1 won.
#1 - Copy
.
I started this process by grabbing a long ruler, a pencil, and some blue painter’s tape, sat down and started to measure and mark things out. stair taping (2)
.
First, I had to decide how far in from each side the runner would start. I decided on 7 inches. There was no formula, or rhyme-or-reason for this decision. I just eyed it up and thought that 7 inches looked like pretty good clearance for the sides of the “funner”.
stair taping (3) stair taping (5)
.
Then I started measuring equal distances across, and down, the rectangular area that the “funner” would be in, in order to make a grid. I used my long ruler and just a regular pencil.
stair taping (8) stair taping (8 1)
.
I had decided on having 5 diamonds go across the stair step, but was undecided on whether or not the diamonds should be 2 high, or just 1 high. To better visualize the impact of both, I taped half the stair off in large diamonds (1 high) and half the stair off in small diamonds (2 high)
stair taping (15)
stair taping (8 2) stair taping (8 3)
.
I liked the added pattern that the small diamonds made, but I liked the elongated shape of the larger diamonds. I decided to go with the larger diamonds because of 2 reasons:
1.) All the stairs together would create quite a lot of pattern.
2.) It would take less tape and time to do the larger ones.
So I got tape-happy and went to town on those stair steps!
stair taping (18)
.
As you can see, from the picture above, some of the tape overlapped the angles where the diamonds meet across the middle of the stair step. To fix that, I got out my exacto knife and sliced away the excess tape. It was actually really easy!
stair taping (19) stair taping (24)
.
I got 3 steps done and decided to take a break and write this post. Then I worked on this post for a while and decided to take a break and do another stair step. So as I am typing, right now, there are 4 stair steps taped off and 7 more to go. The first step took quite a while (like over an hour!) because I had to figure out exactly what was going to happen, but the subsequent steps are taking about 25 minutes a piece. That means I have about 3 and 1/2 more hours of work ahead of me to get all of them taped.
*******SIGH*******
(hang on a minute, now I am going to go take a break from everything and cry in the corner for a bit) :*(
.
OK, I am better now! 😀
.
stair taping (26) stair taping (27)
.
It may take me a while, but the taping will be finished by the end of today! Painting starts tomorrow! Mark my words, ASML family, it WILL be done! (picture me standing on a soapbox with the American flag waving behind me, well dressed (think Jackie O.), and with my head tilted slightly, looking off into the distance)

.
Anyway, I must get off this computer and get back to taping.
I think that I will have dreams tonight of being bound up in blue tape. Or maybe that a giant blue tape monster is chasing me with its sticky arms reaching out for me!
Home improvement can be scary stuff, folks, scary stuff.
.
LIVE SIMPLY AND CHANGE THE WORLD!!


FYI July 8, 2014

Filed under: Uncategorized — asimplemodernlife @ 1:12 am
Tags: , ,

Now normally, “FYI” would mean that I am about to tell you something “for your information”. While this is true, this post’s name has another reason. FYI television network. Never heard of it?
Me either….
that is until an awesome friend of mine, knowing about my love of tiny houses, told me about it. The network, which is fairly new and unheard of, is starting a new show called “Tiny House Nation”.
It starts Wednesday! Wednesday, July 8th, 2014!
tiny-house-official-logo-B
.
SOOOOOOO EXCITED!!!! (here is a link to the show’s preview)
.
While I do not have cable (and even if I did, the channel wouldn’t be available here), I am really, really hoping that they will have it available to watch online, as they do for some of their other shows.
.
After Meghan (my awesome friend), told me about “Tiny House Nation”, I went directly to my computer and did all kinds of research on this new channel. On their website,www.fyi.tv, you can watch a few of their shows.
.
I loved “Rowhouse Showdown”. It is about 3 couples who are competing against one another in renovating 3 houses, one room at a time. Carter Oosterhouse is the host and it is a super fun show to watch.
.
Another good one is “B.O.R.N. to Style”. Hilarious and informative (in terms of fashion, anyway).
Women get a self-esteem boost and learn how amazing they are at the hand of 4 guys who run their own boutique. Just awesome.
.
Keep your fingers crossed that “Tiny House Nation” will be available to view online! Or maybe your lucky enough to have the channel available to you!
.
Here’s the link to the viewing website: FYI TV
.
LIVE SIMPLY AND CHANGE THE WORLD!!


and the results are in… July 4, 2014

Filed under: Design — asimplemodernlife @ 9:11 pm

For all of you United States people out there, Happy Independence Day! For the rest of you, I hope your day is going well, where ever you are.
.
So, here’s a short post that has 1 reason for existing:
.
The results from the stair painting post ARE IN!!!

And the winner is …………………………………………………………………………………………………………………………………………………………………………………………………………………. …………………………………………………………………………………………………………………………………………………………………………………………………………………………………………………………………………
#1!!
#1 - Copy
.
So this diamond pattern will be the painted runner that goes down the stairs. Thanks to everyone who voted, on the blog and on Facebook. It was kind of nice, and kind of nerve-racking at the same time, to leave the decision up to others. The weirdest part? My favorite was number 2 and NO ONE voted for that one! Not one single, solitary soul!
I’m not sure what that means exactly.
I’m going with my style is just too advanced for others to appreciate.
Yeah.
That’s it.
Too advanced!
😉
.
The second round of stair painting starts on Monday. So stay tuned towards the end of next week to see your pattern choice in action!
.
LIVE SIMPLY AND CHANGE THE WORLD!!