Yep, you read that post title correctly, DONE! You really have no idea how happy I am, how liberating it is to have these stairs finally finished! 7 months we have lived with unfinished ugliness, but NO LONGER!
.
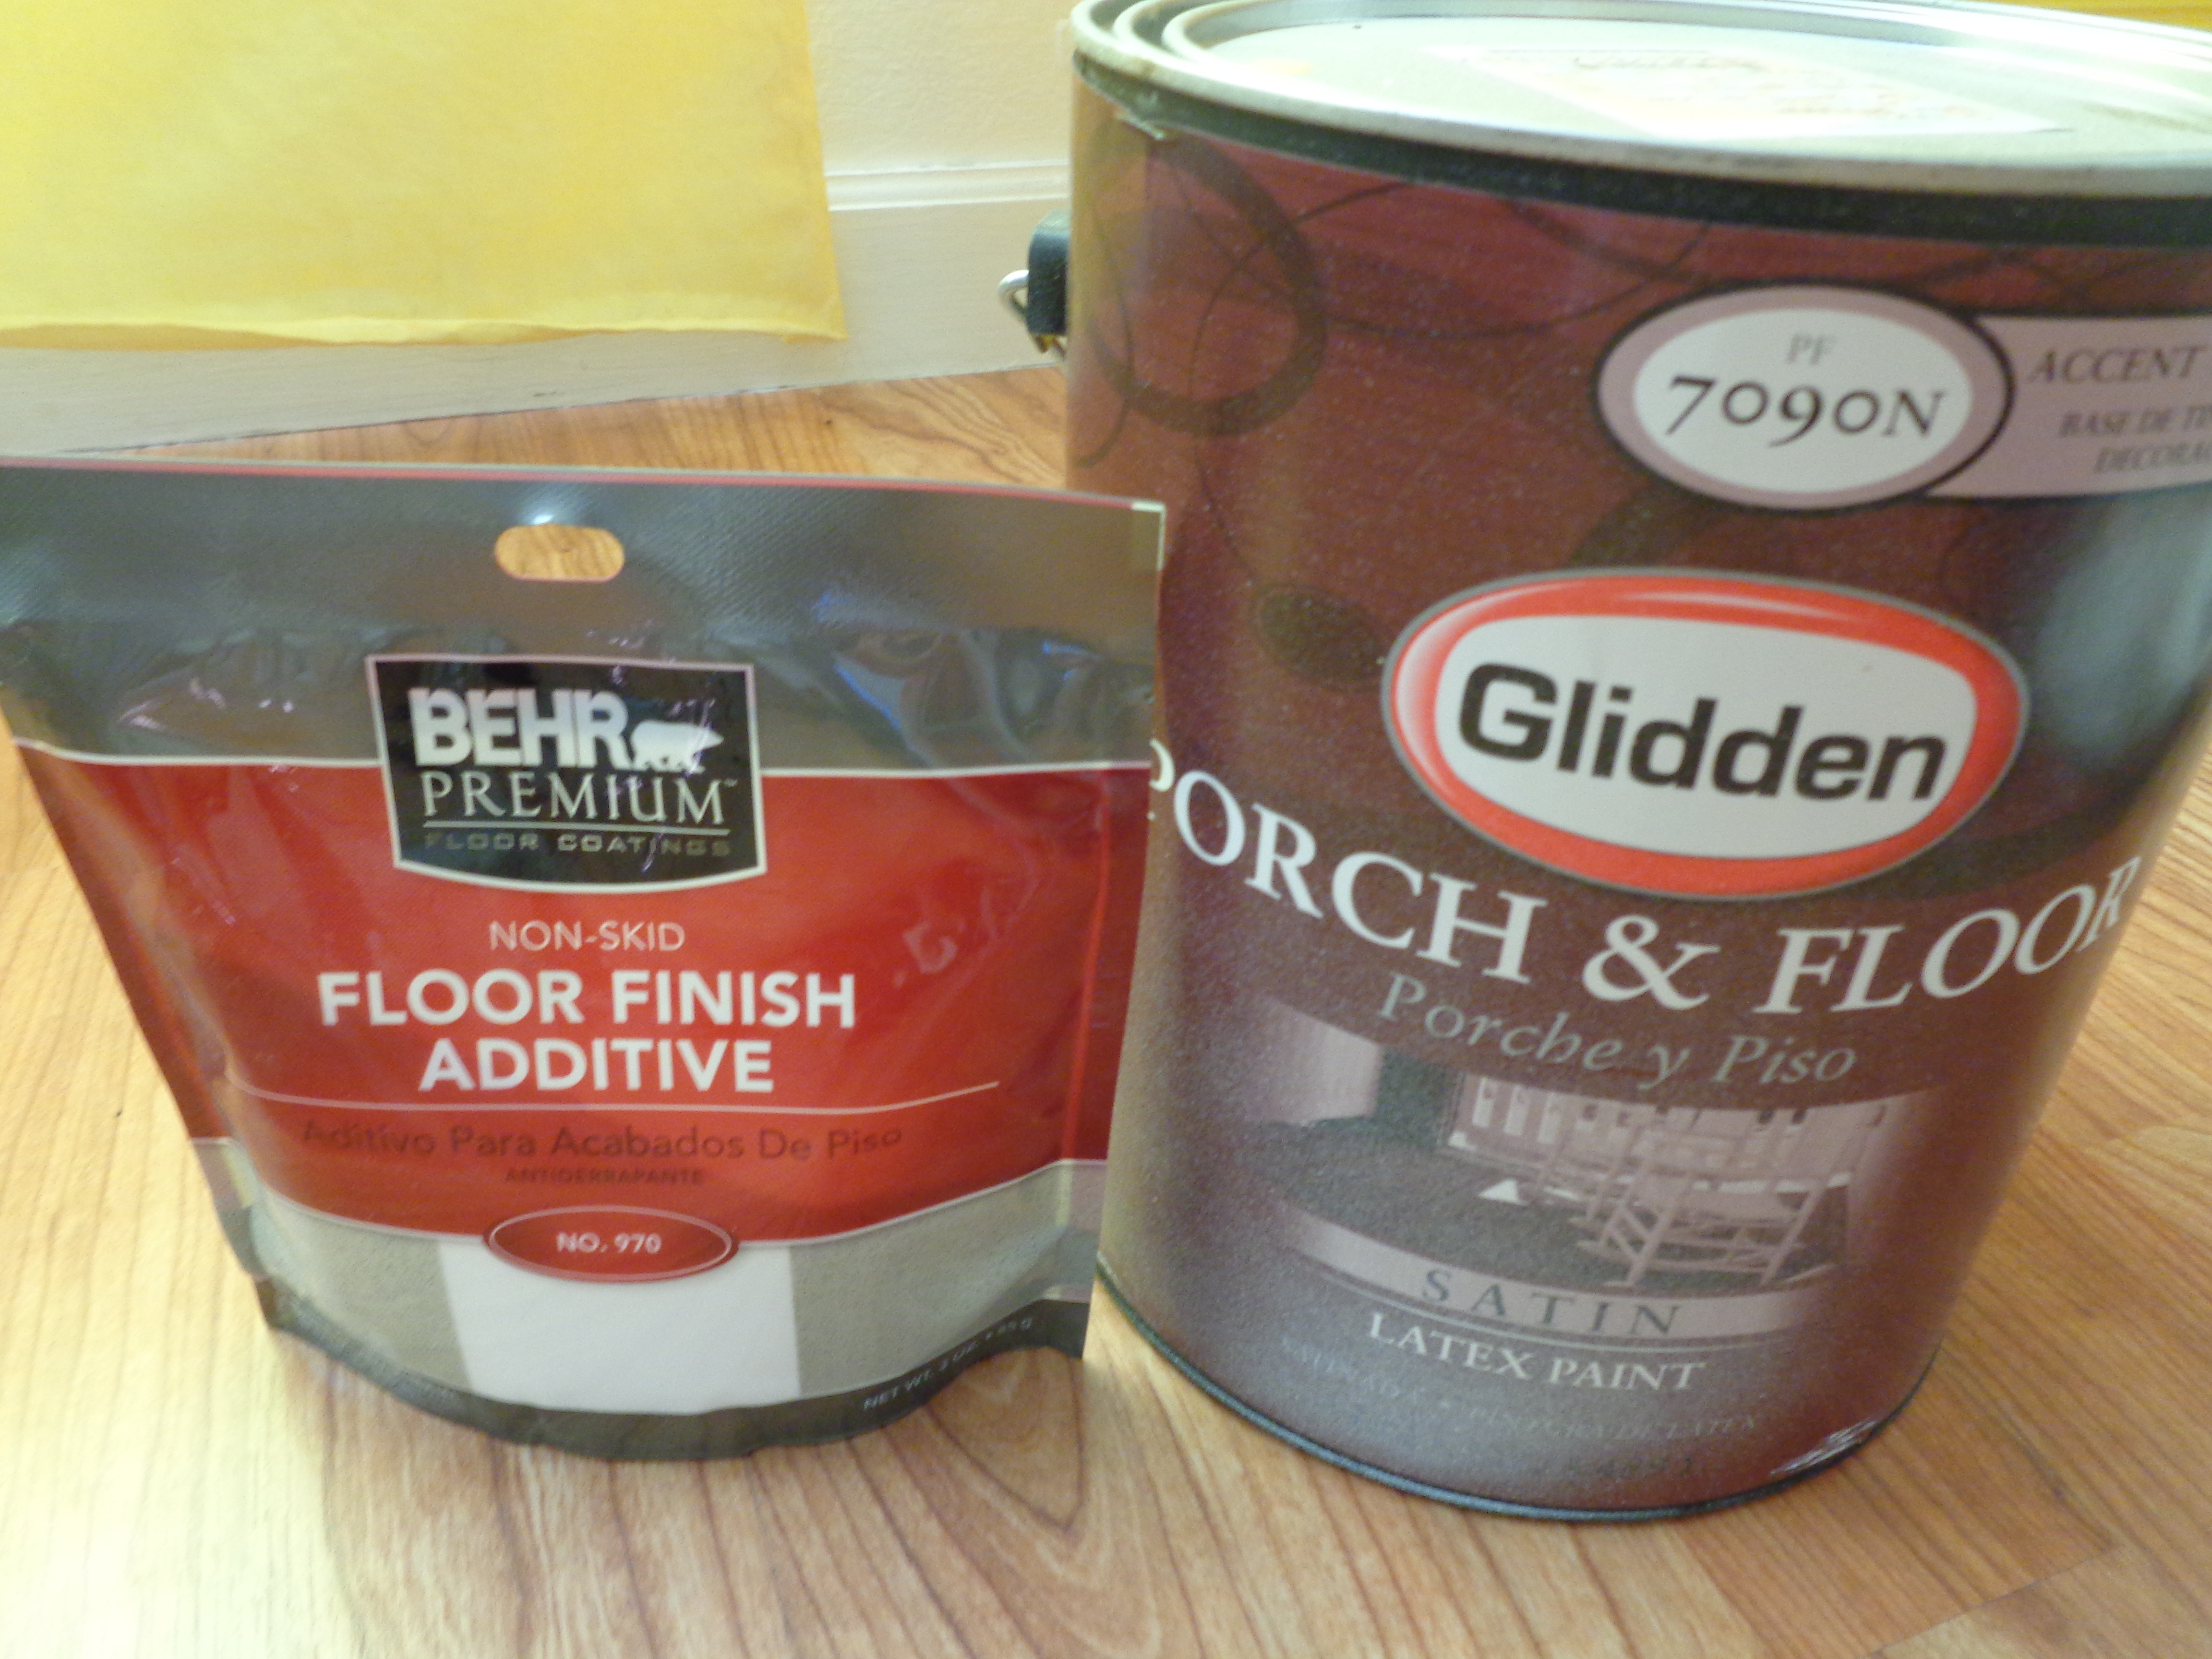
After I finished taping off the diamond pattern on the stair steps, I got my handy-dandy yellow floor paint and the non-skid additive I had purchased, over 7 months ago, and mixed them up in an old cool whip container.

.
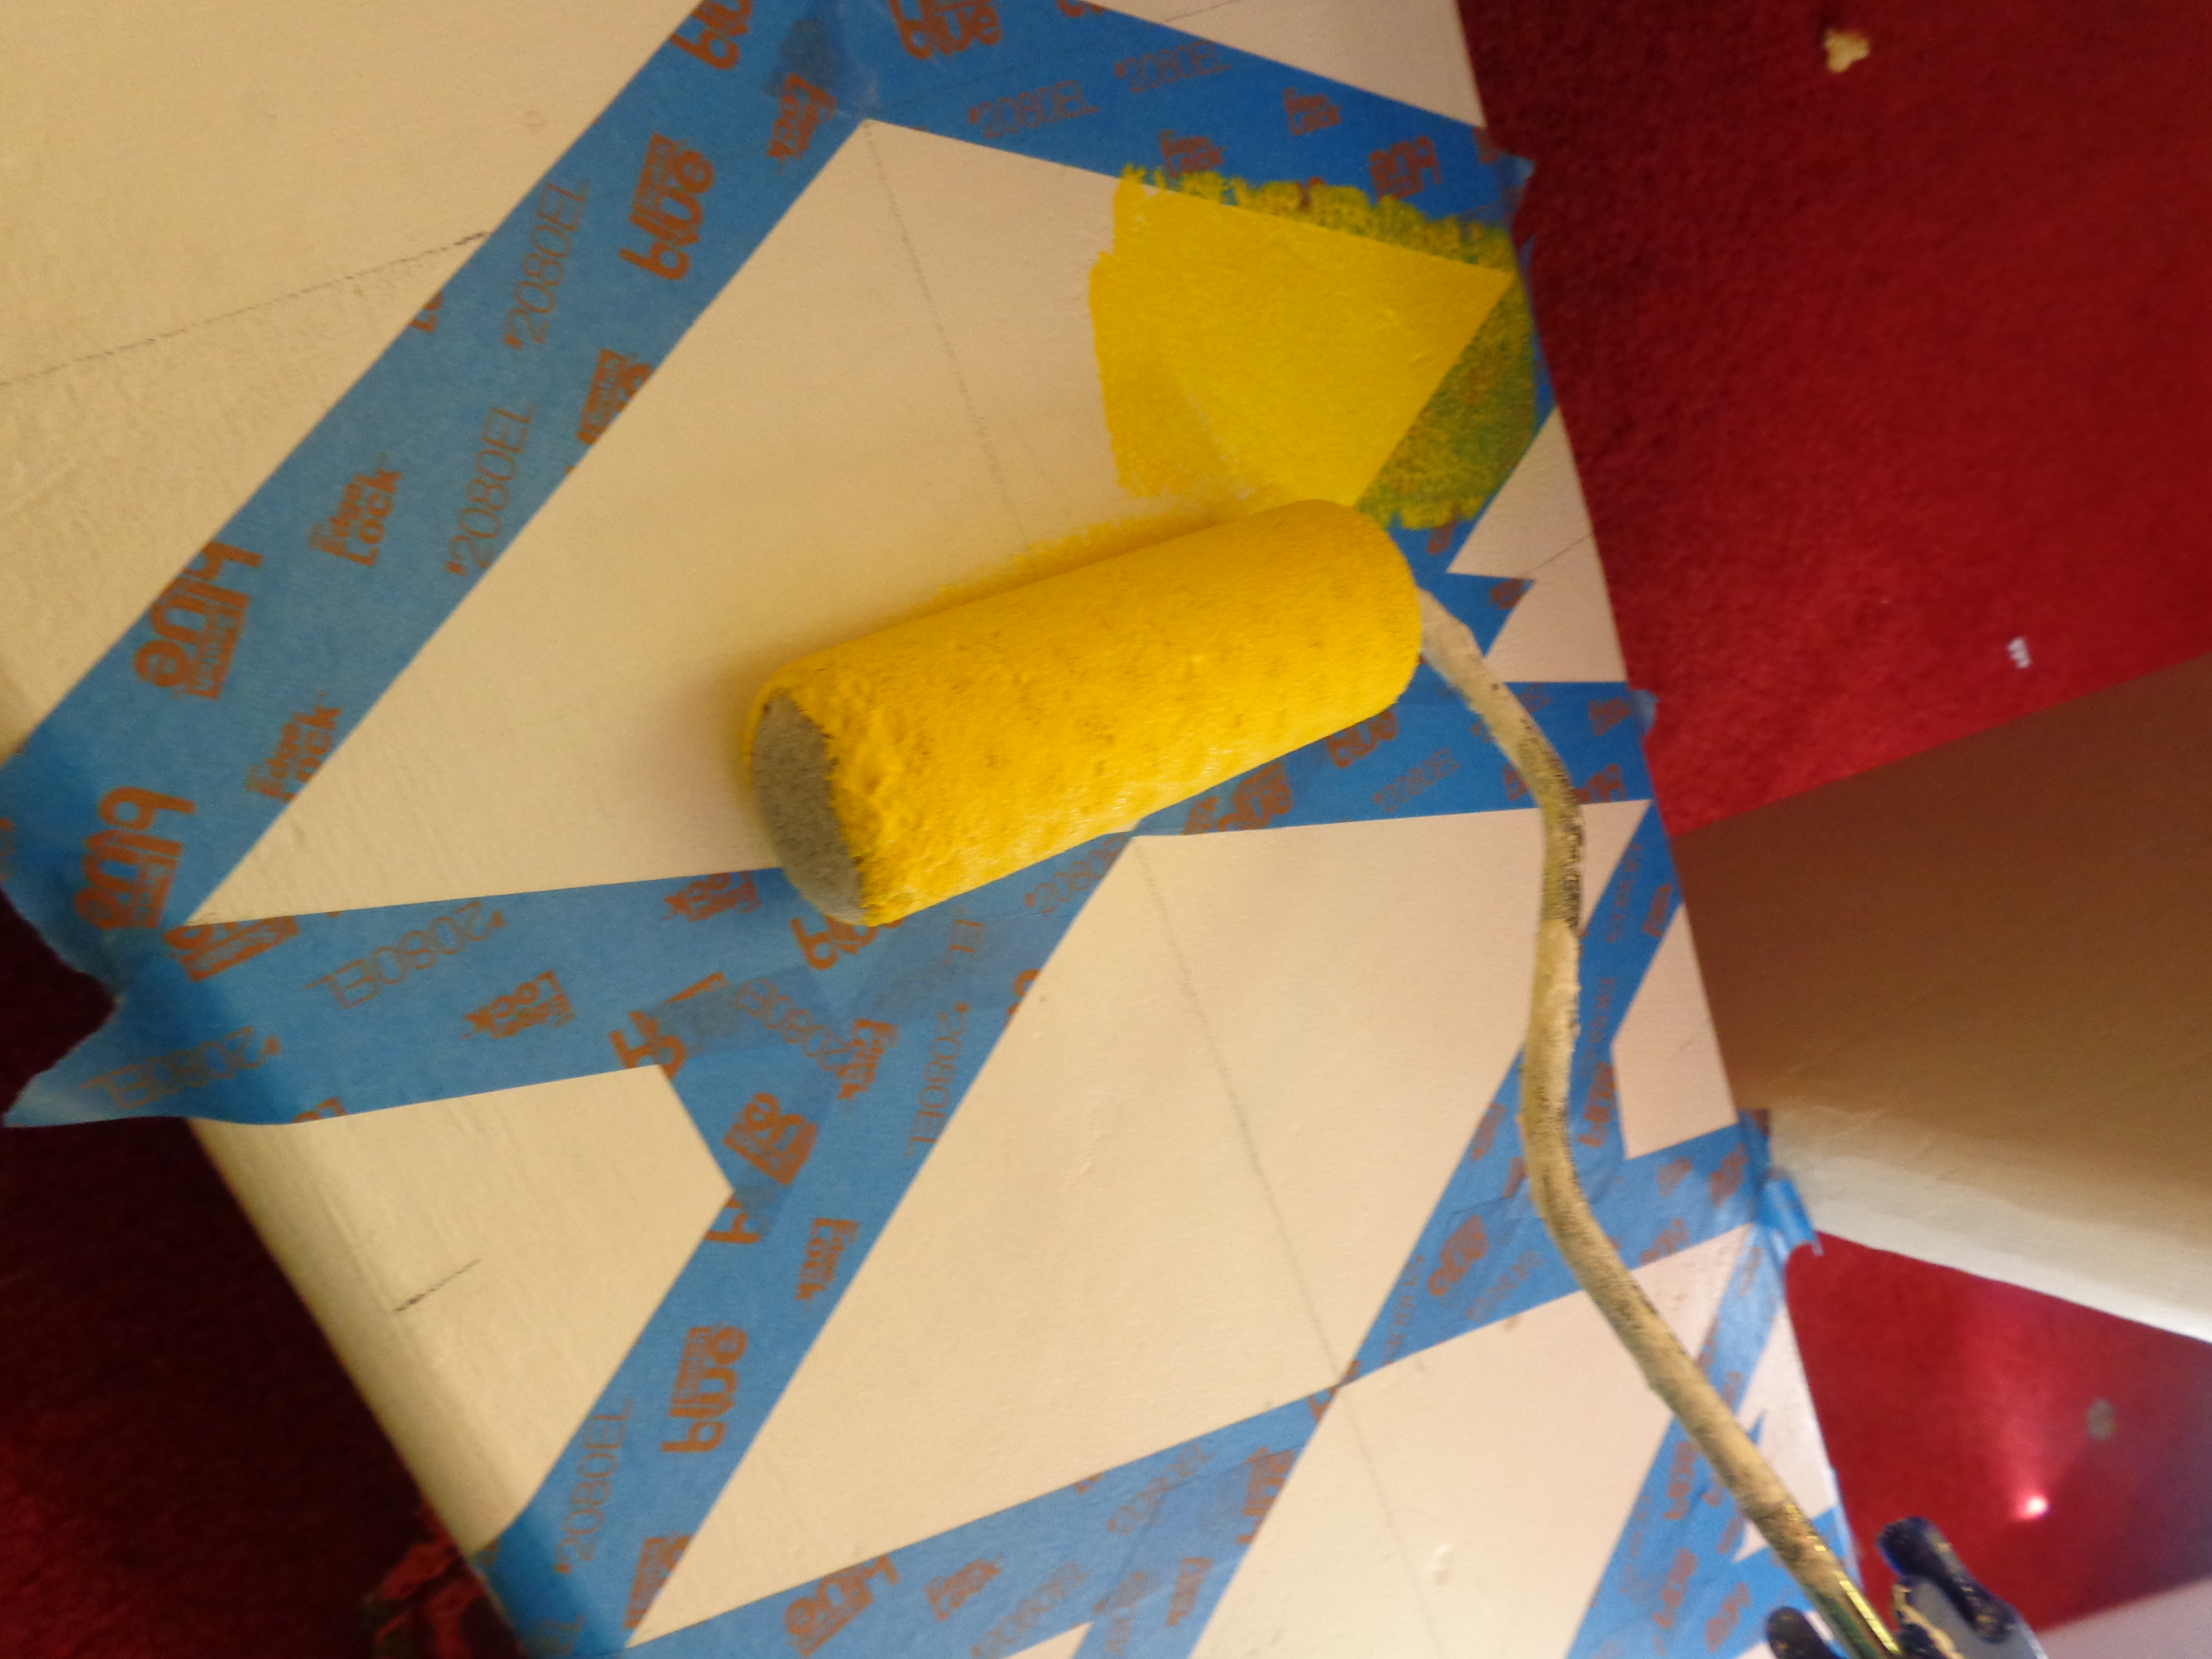
Then I got out my little roller, which I think is utterly adorable, and put 5 coats of the gritty paint mixture onto the stair steps.
.
The only problem that I had with this process is that the pencil lines from my grid were a bit hard to cover over with the paint. If you decide to do something like this, use a Magic Eraser (which truly is magic) and remove the pencil lines before painting. You can still see some of the pencil lines left over from the grid I used to make the diamond pattern on the white parts. 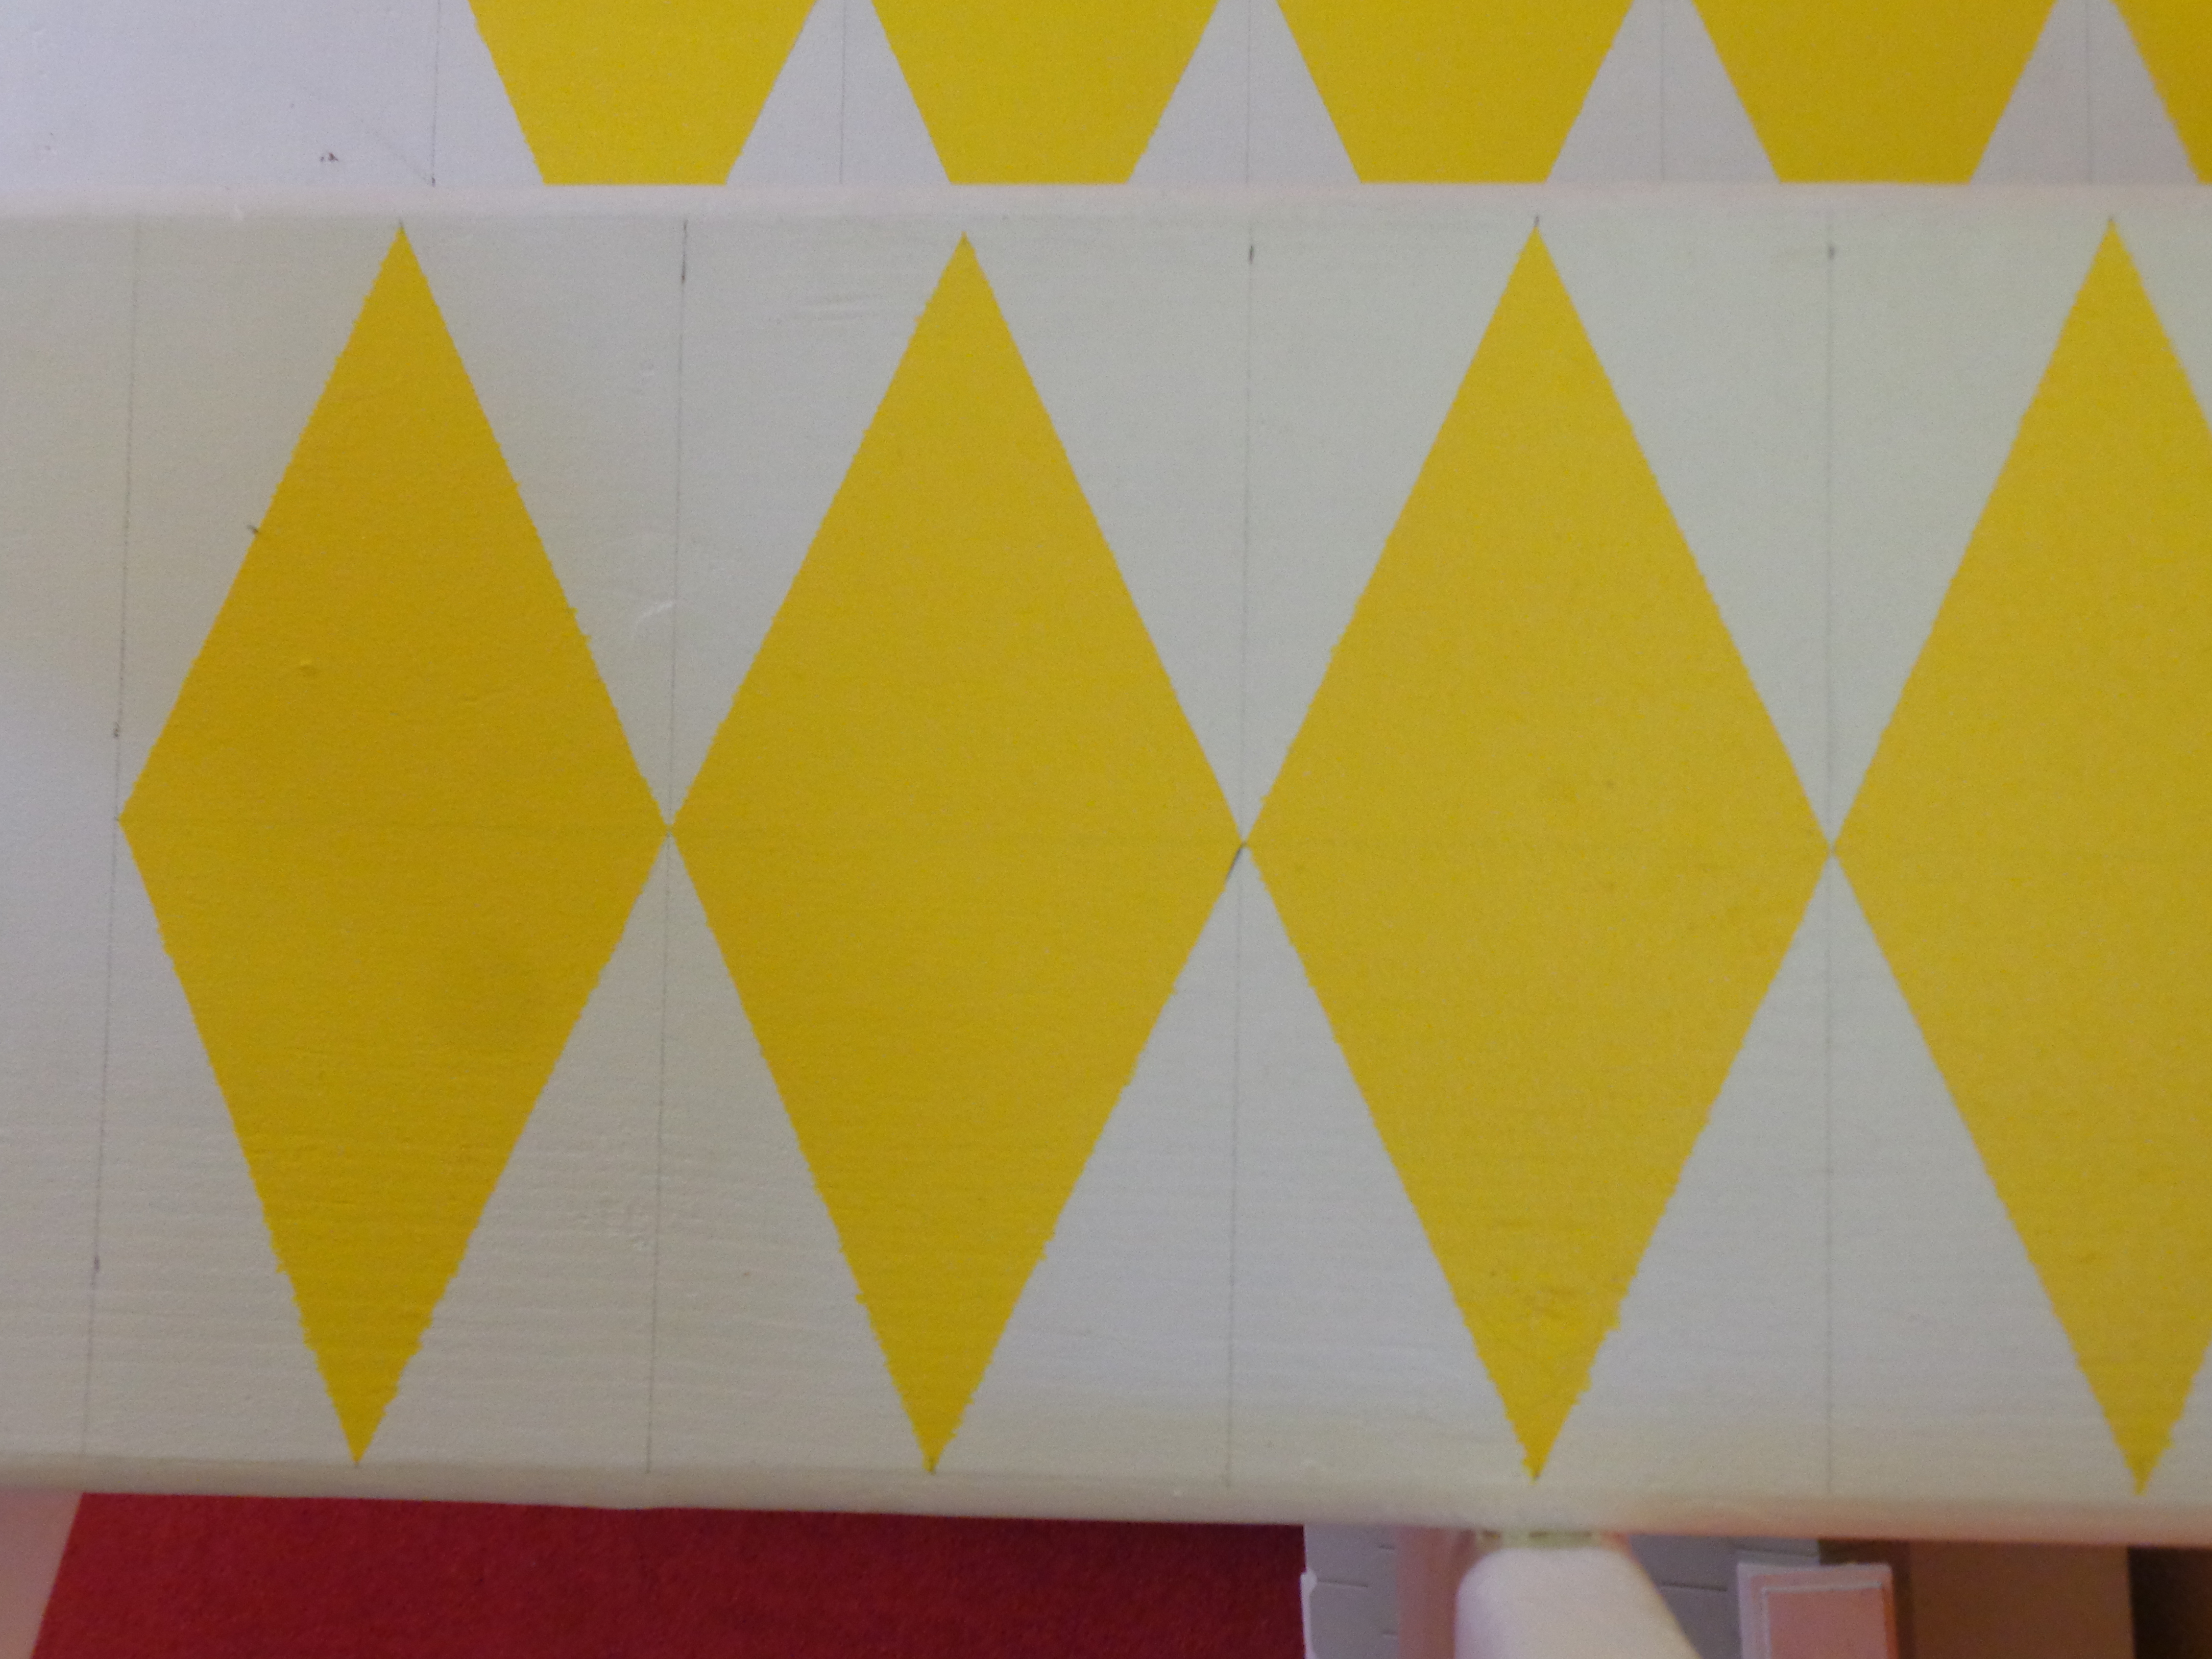
I am planning on “erasing” them as soon as the yellow has had a chance to really dry and set properly. The last thing I want to do is rub off the edges of the yellow diamonds and have to do this again!
.
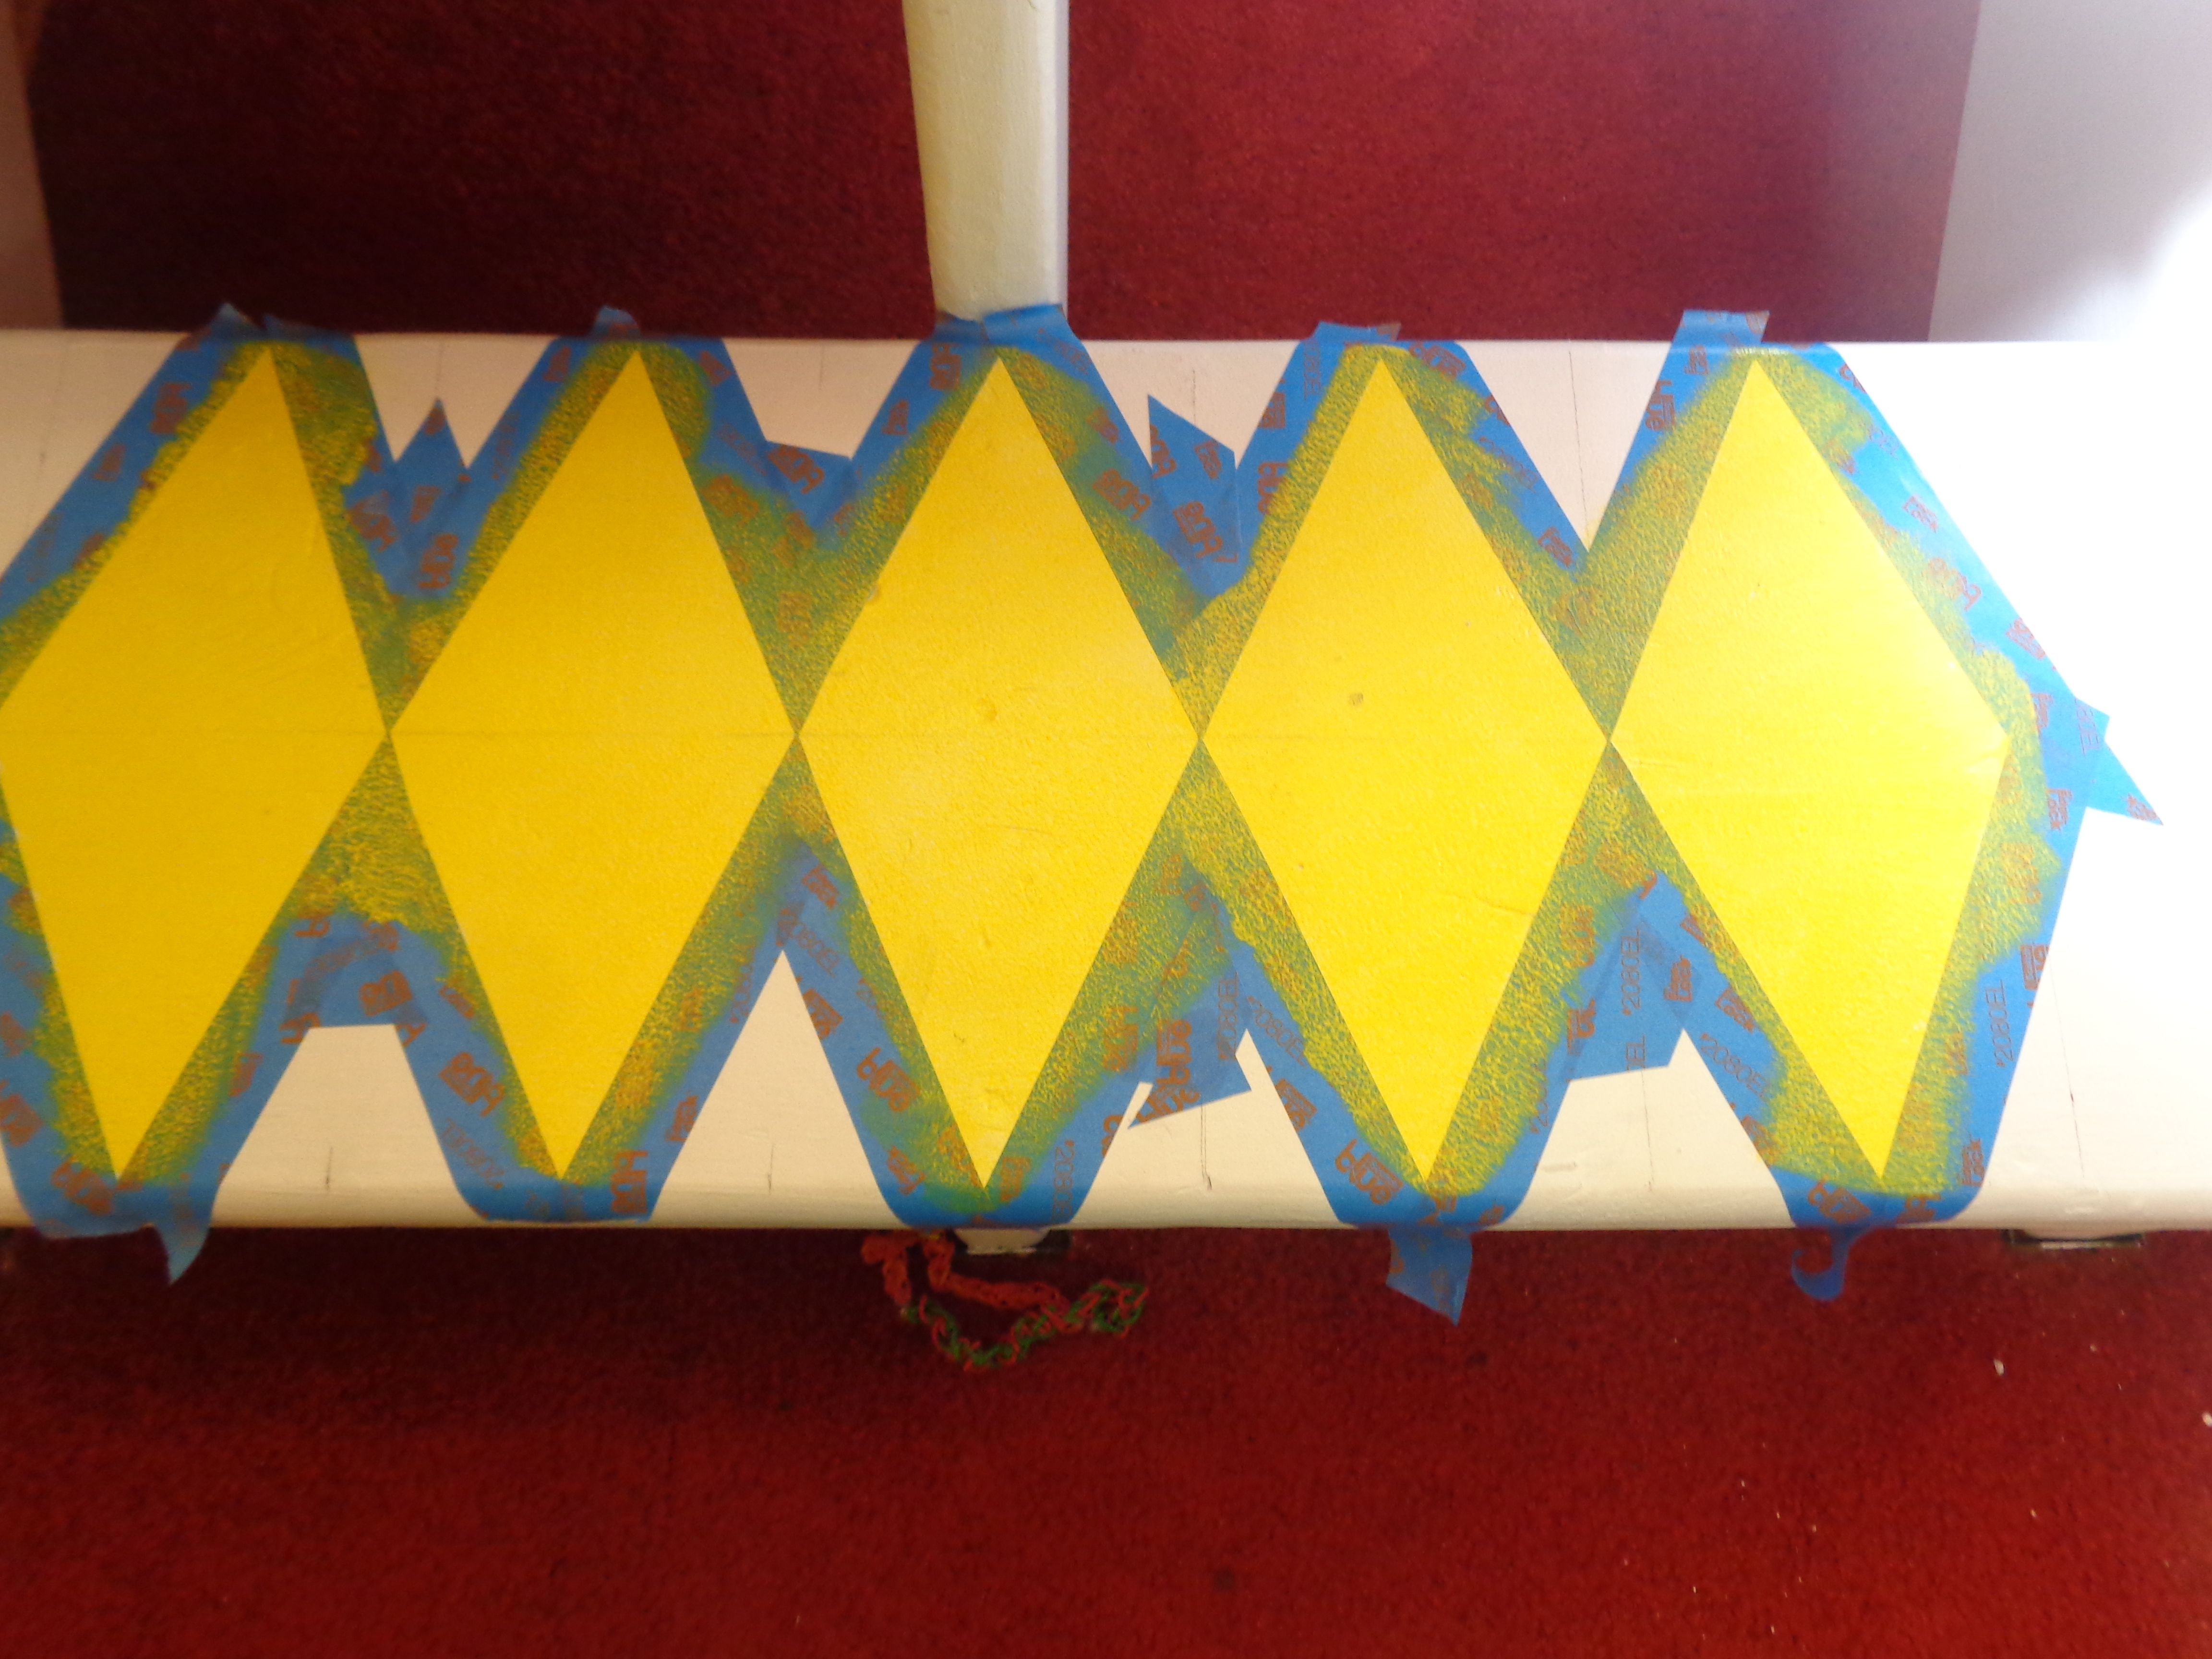
Here’s the final product:


.
I LOVE IT!
The original plan was to add some lines on each edge of the diamond pattern to make it look like a true runner like this:

but once we saw it, the hubby and I both agreed that it looked awesome as-is.
.
We kind of like the “runway” look it has from the top of the stairs; like arrows leading you down. We also like the fact that it doesn’t look exactly like a traditional runner, but has a bit of a “funky” feel to it.
.
What do you all think?
I think that it definitely earned the term “funner”. 🙂
.
LIVE SIMPLY AND CHANGE THE WORLD!!
The stairs are done! July 12, 2014
“The Taping of the Stairs” July 9, 2014
For those of you who are Shakespeare fans out there, do you get the title of this post? 🙂
“The Taming of the Shrew” is one of my absolute favorite plays EVER!
.
Yes.
I am a corny dork.
And I am perfectly OK with that.
.
Back to the post at hand, STAIR PROGRESS!!
The first post about the stairs where I gave them a nice coat of plain white floor paint can be found here. But now it’s on to slightly more exciting pursuits. Taping off the design that will be the faux, painted runner.(“funner”, if you will)
.
You all voted, both on here and on Facebook, and design #1 won.

.
I started this process by grabbing a long ruler, a pencil, and some blue painter’s tape, sat down and started to measure and mark things out. 
.
First, I had to decide how far in from each side the runner would start. I decided on 7 inches. There was no formula, or rhyme-or-reason for this decision. I just eyed it up and thought that 7 inches looked like pretty good clearance for the sides of the “funner”.


.
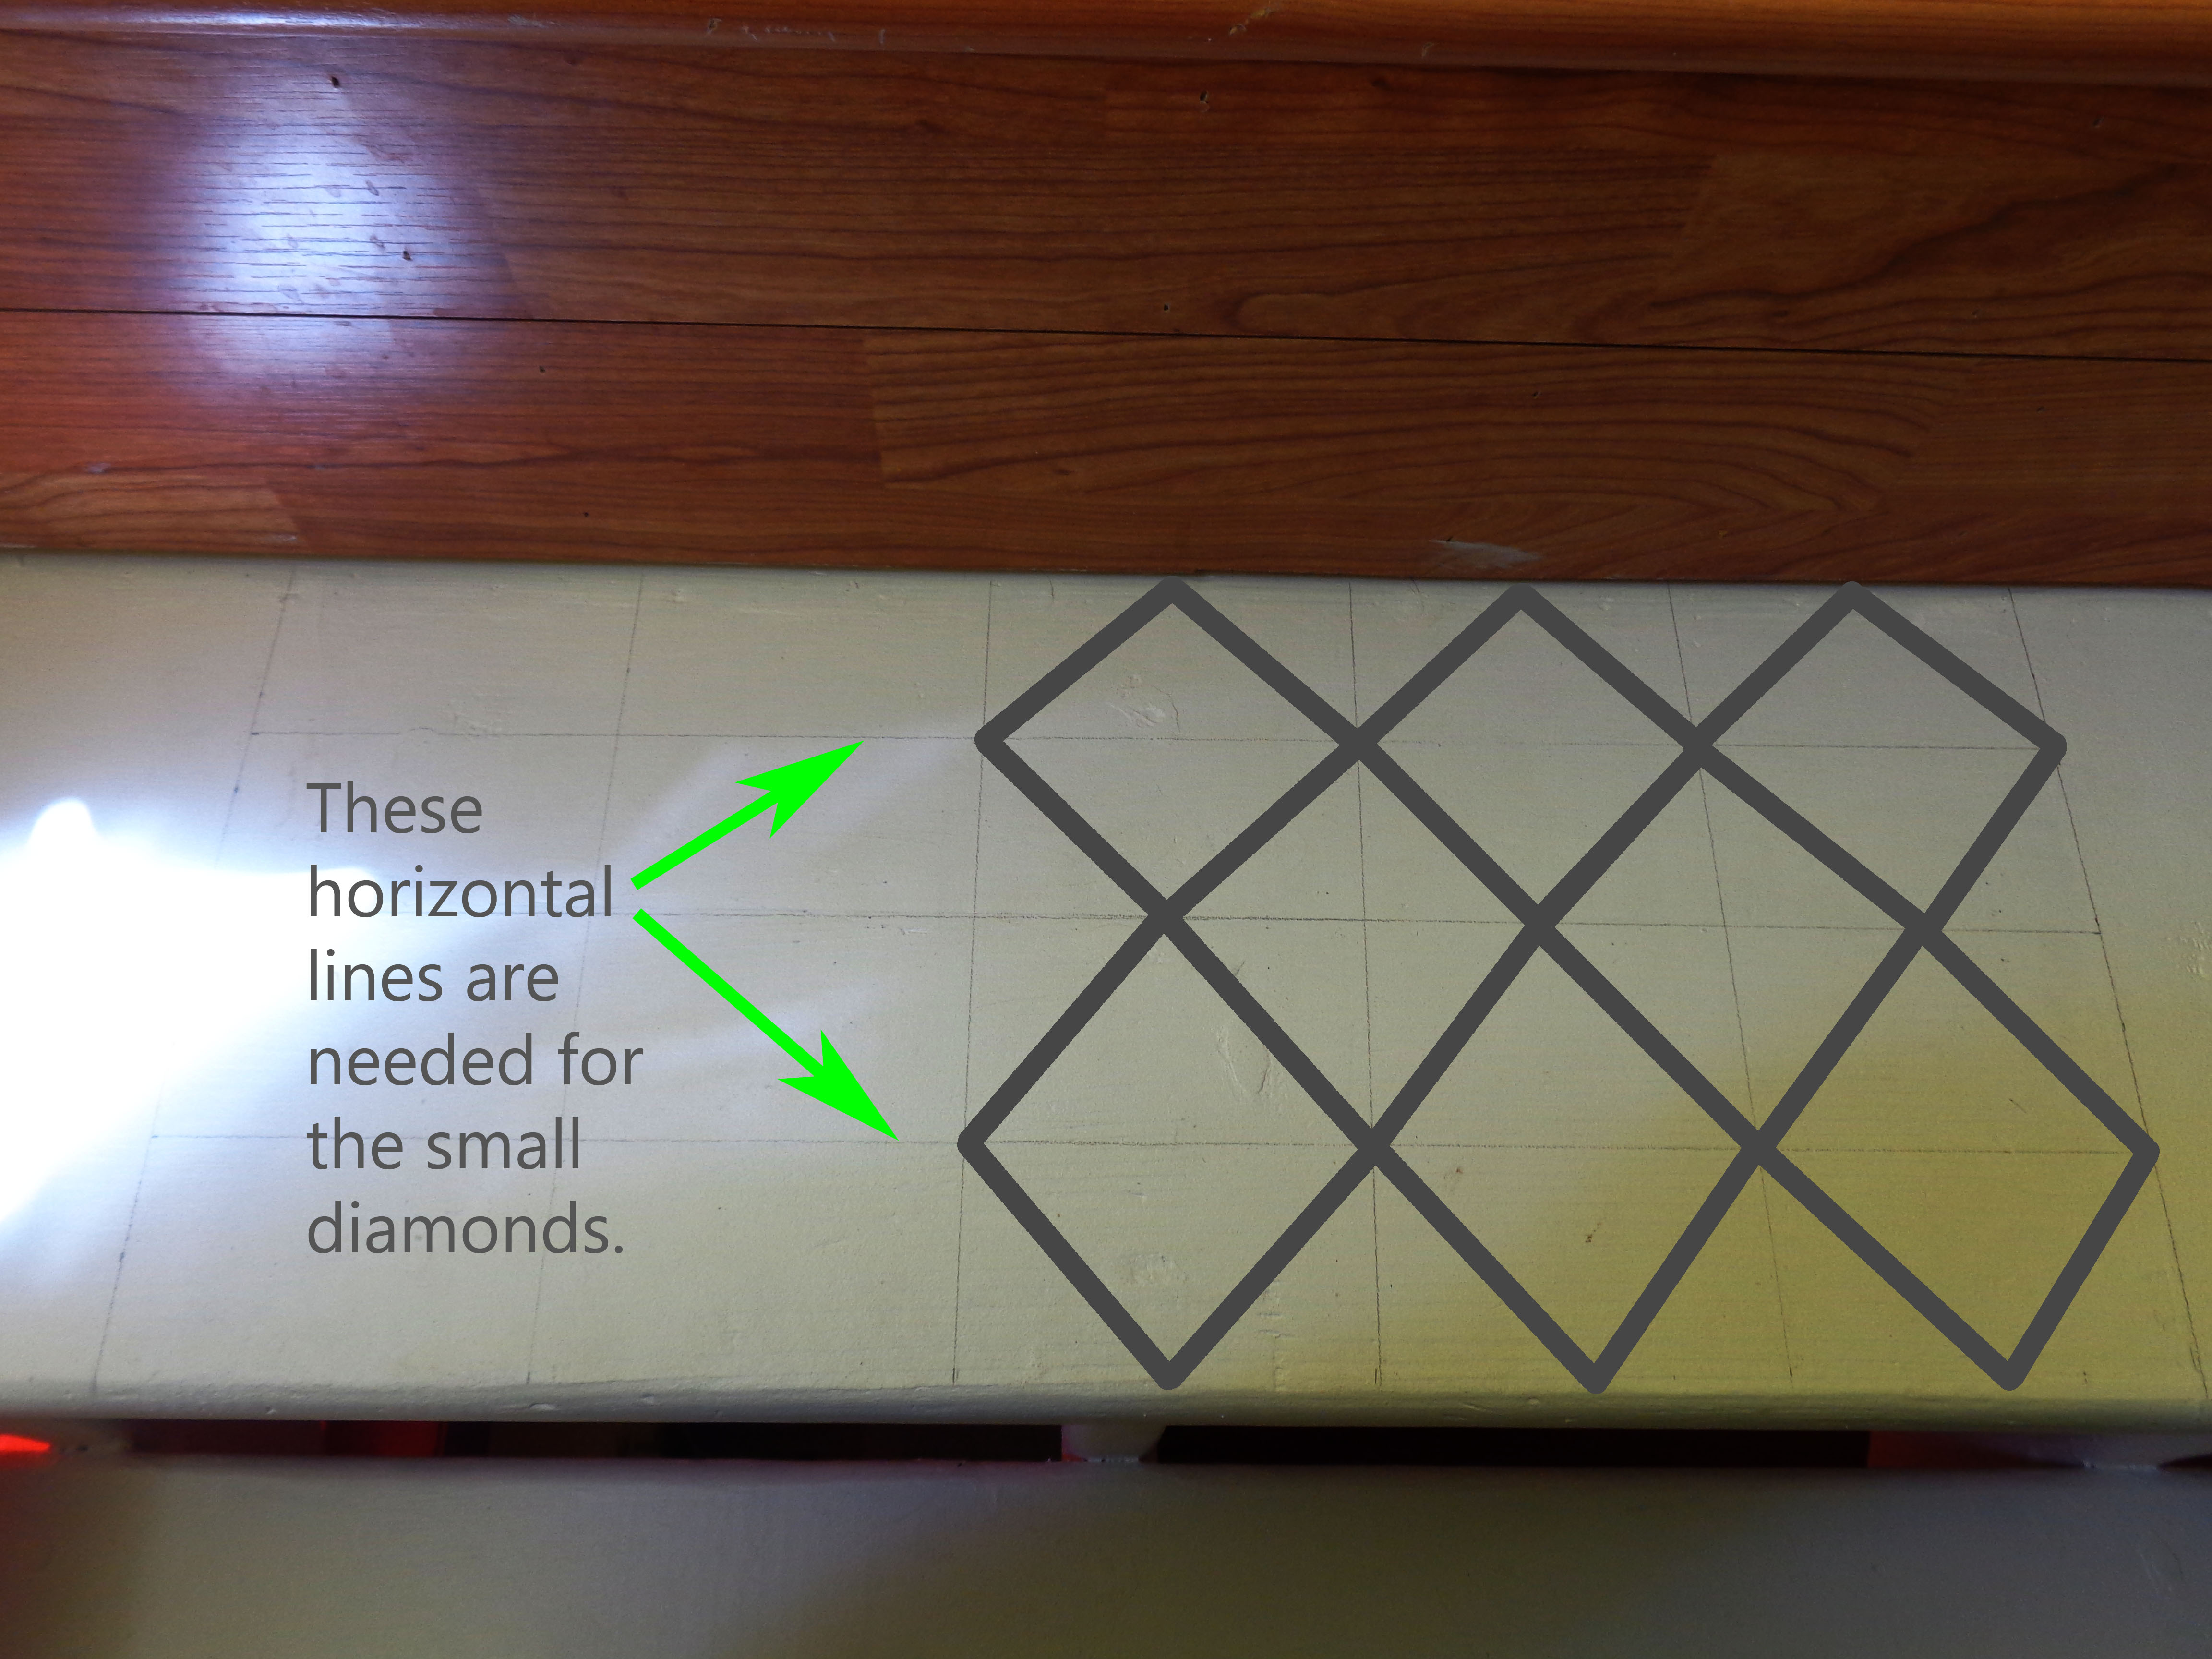
Then I started measuring equal distances across, and down, the rectangular area that the “funner” would be in, in order to make a grid. I used my long ruler and just a regular pencil.
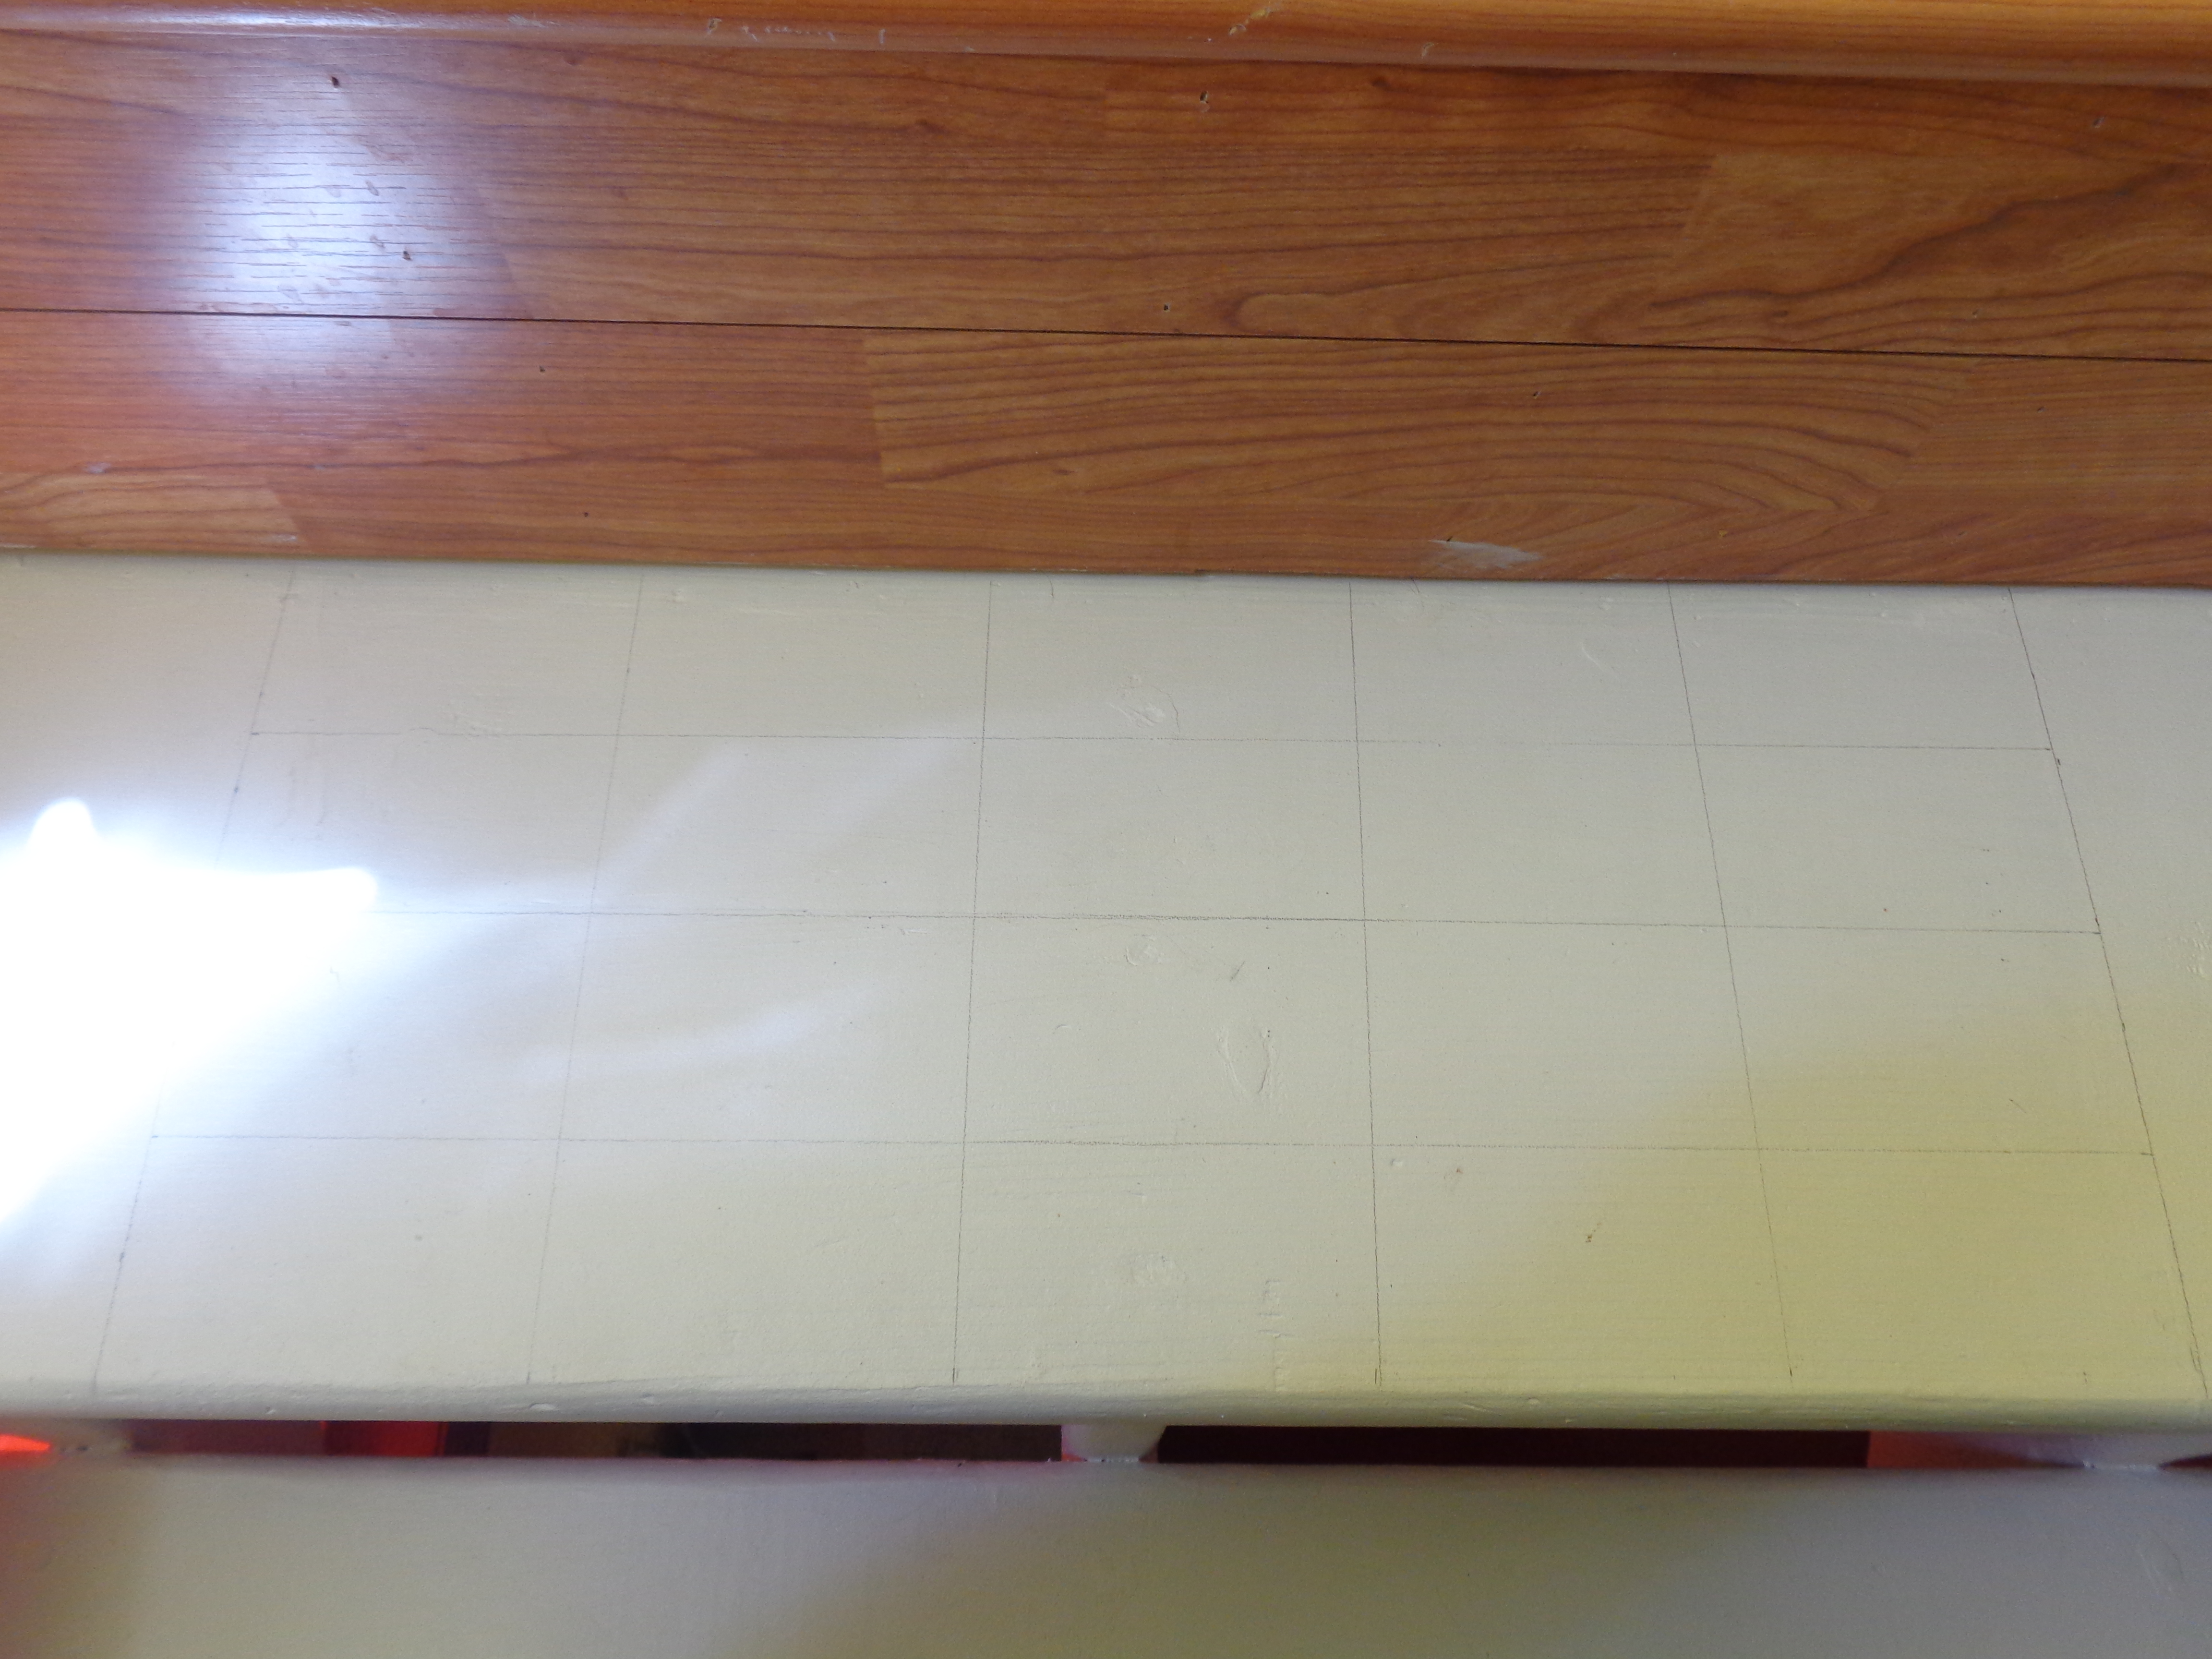
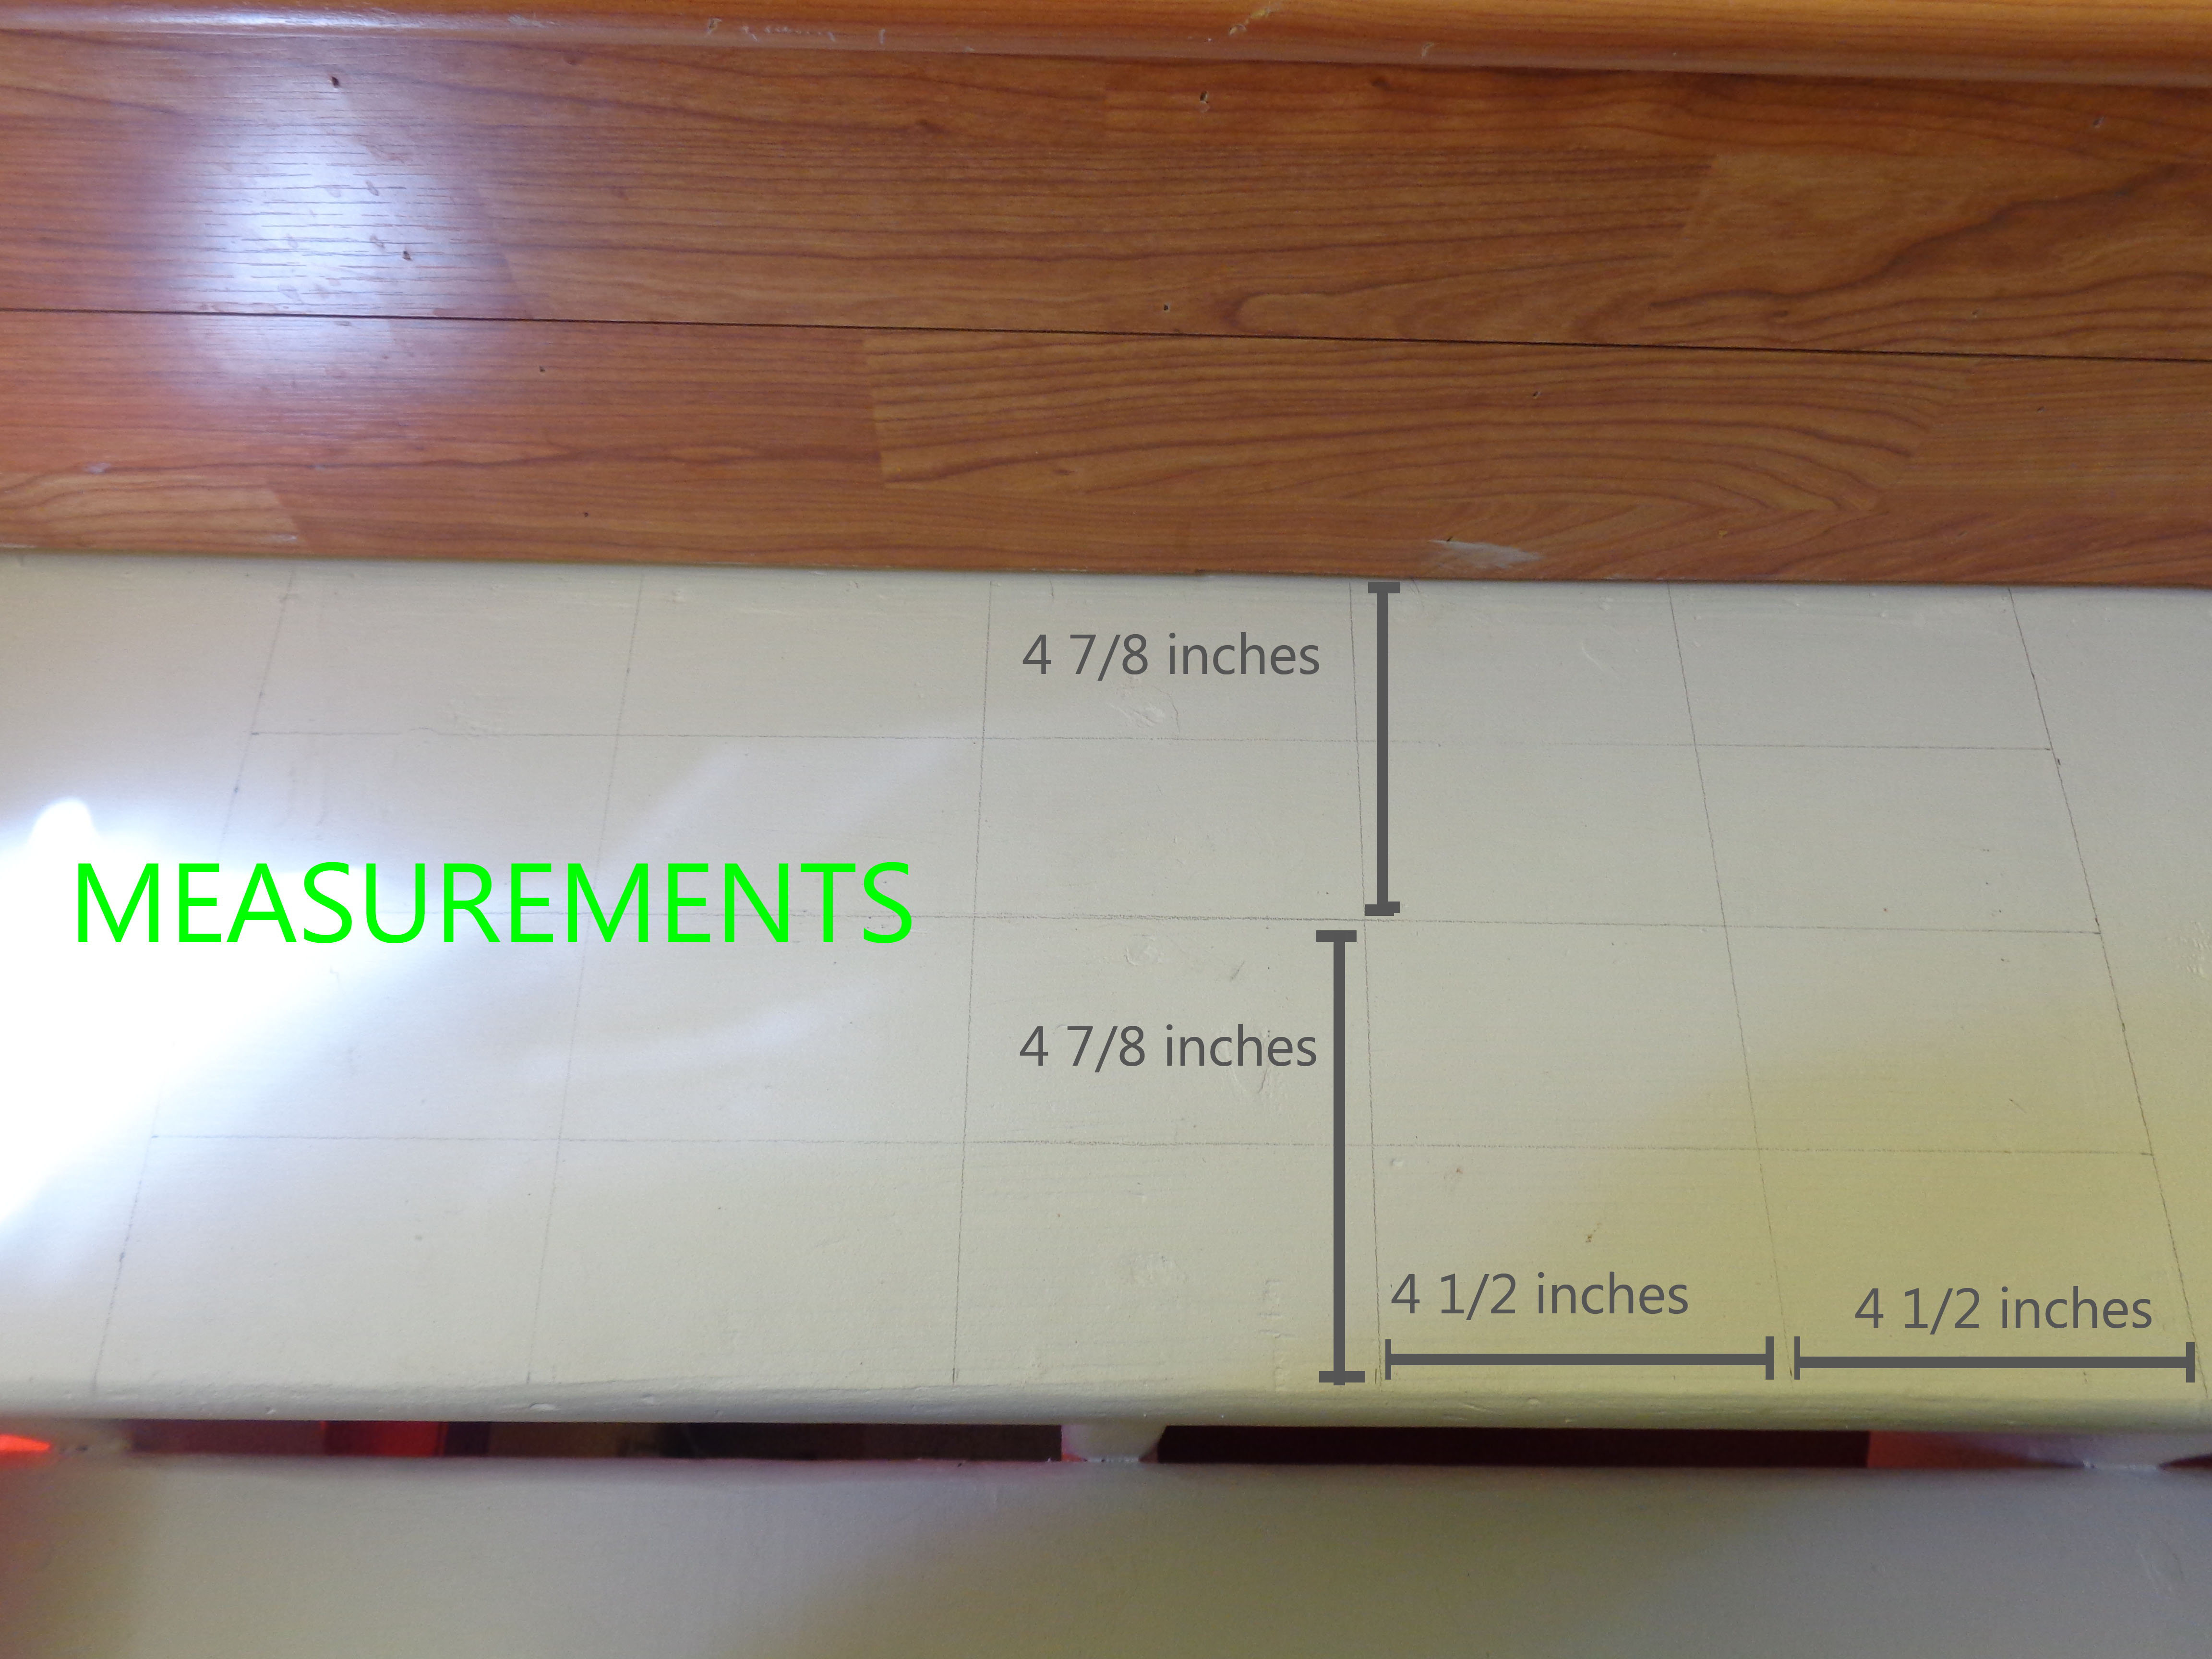
.
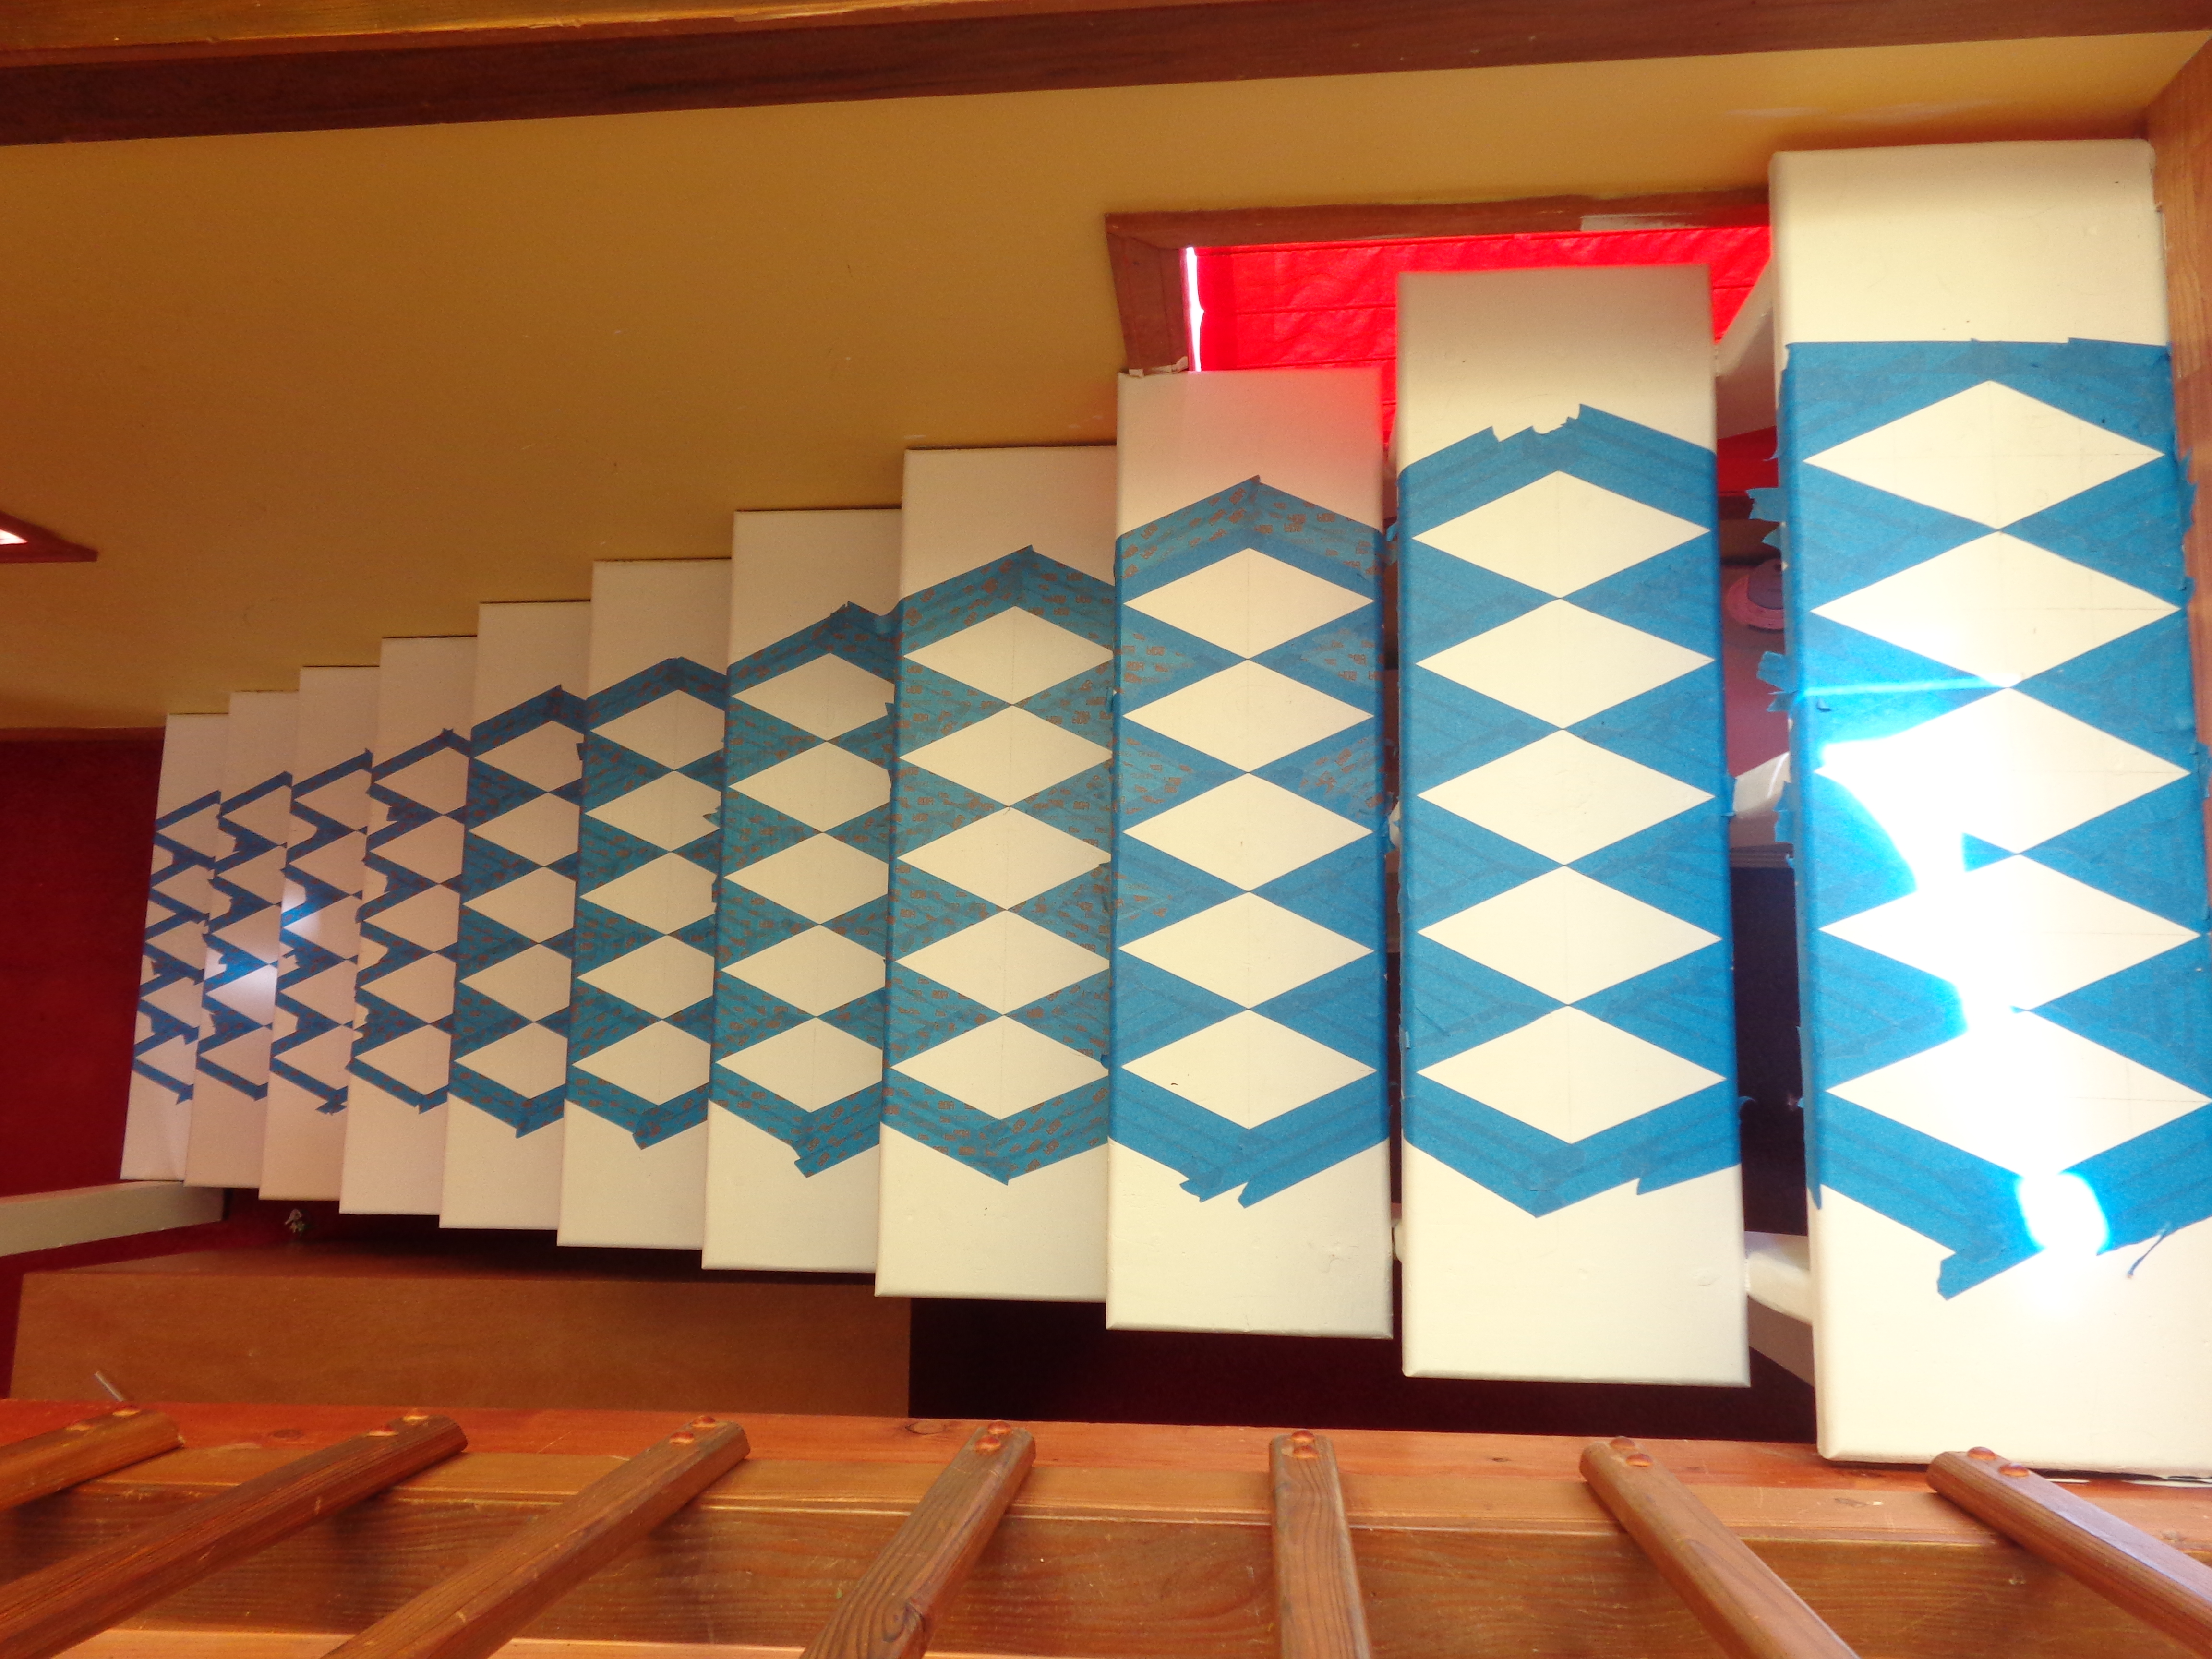
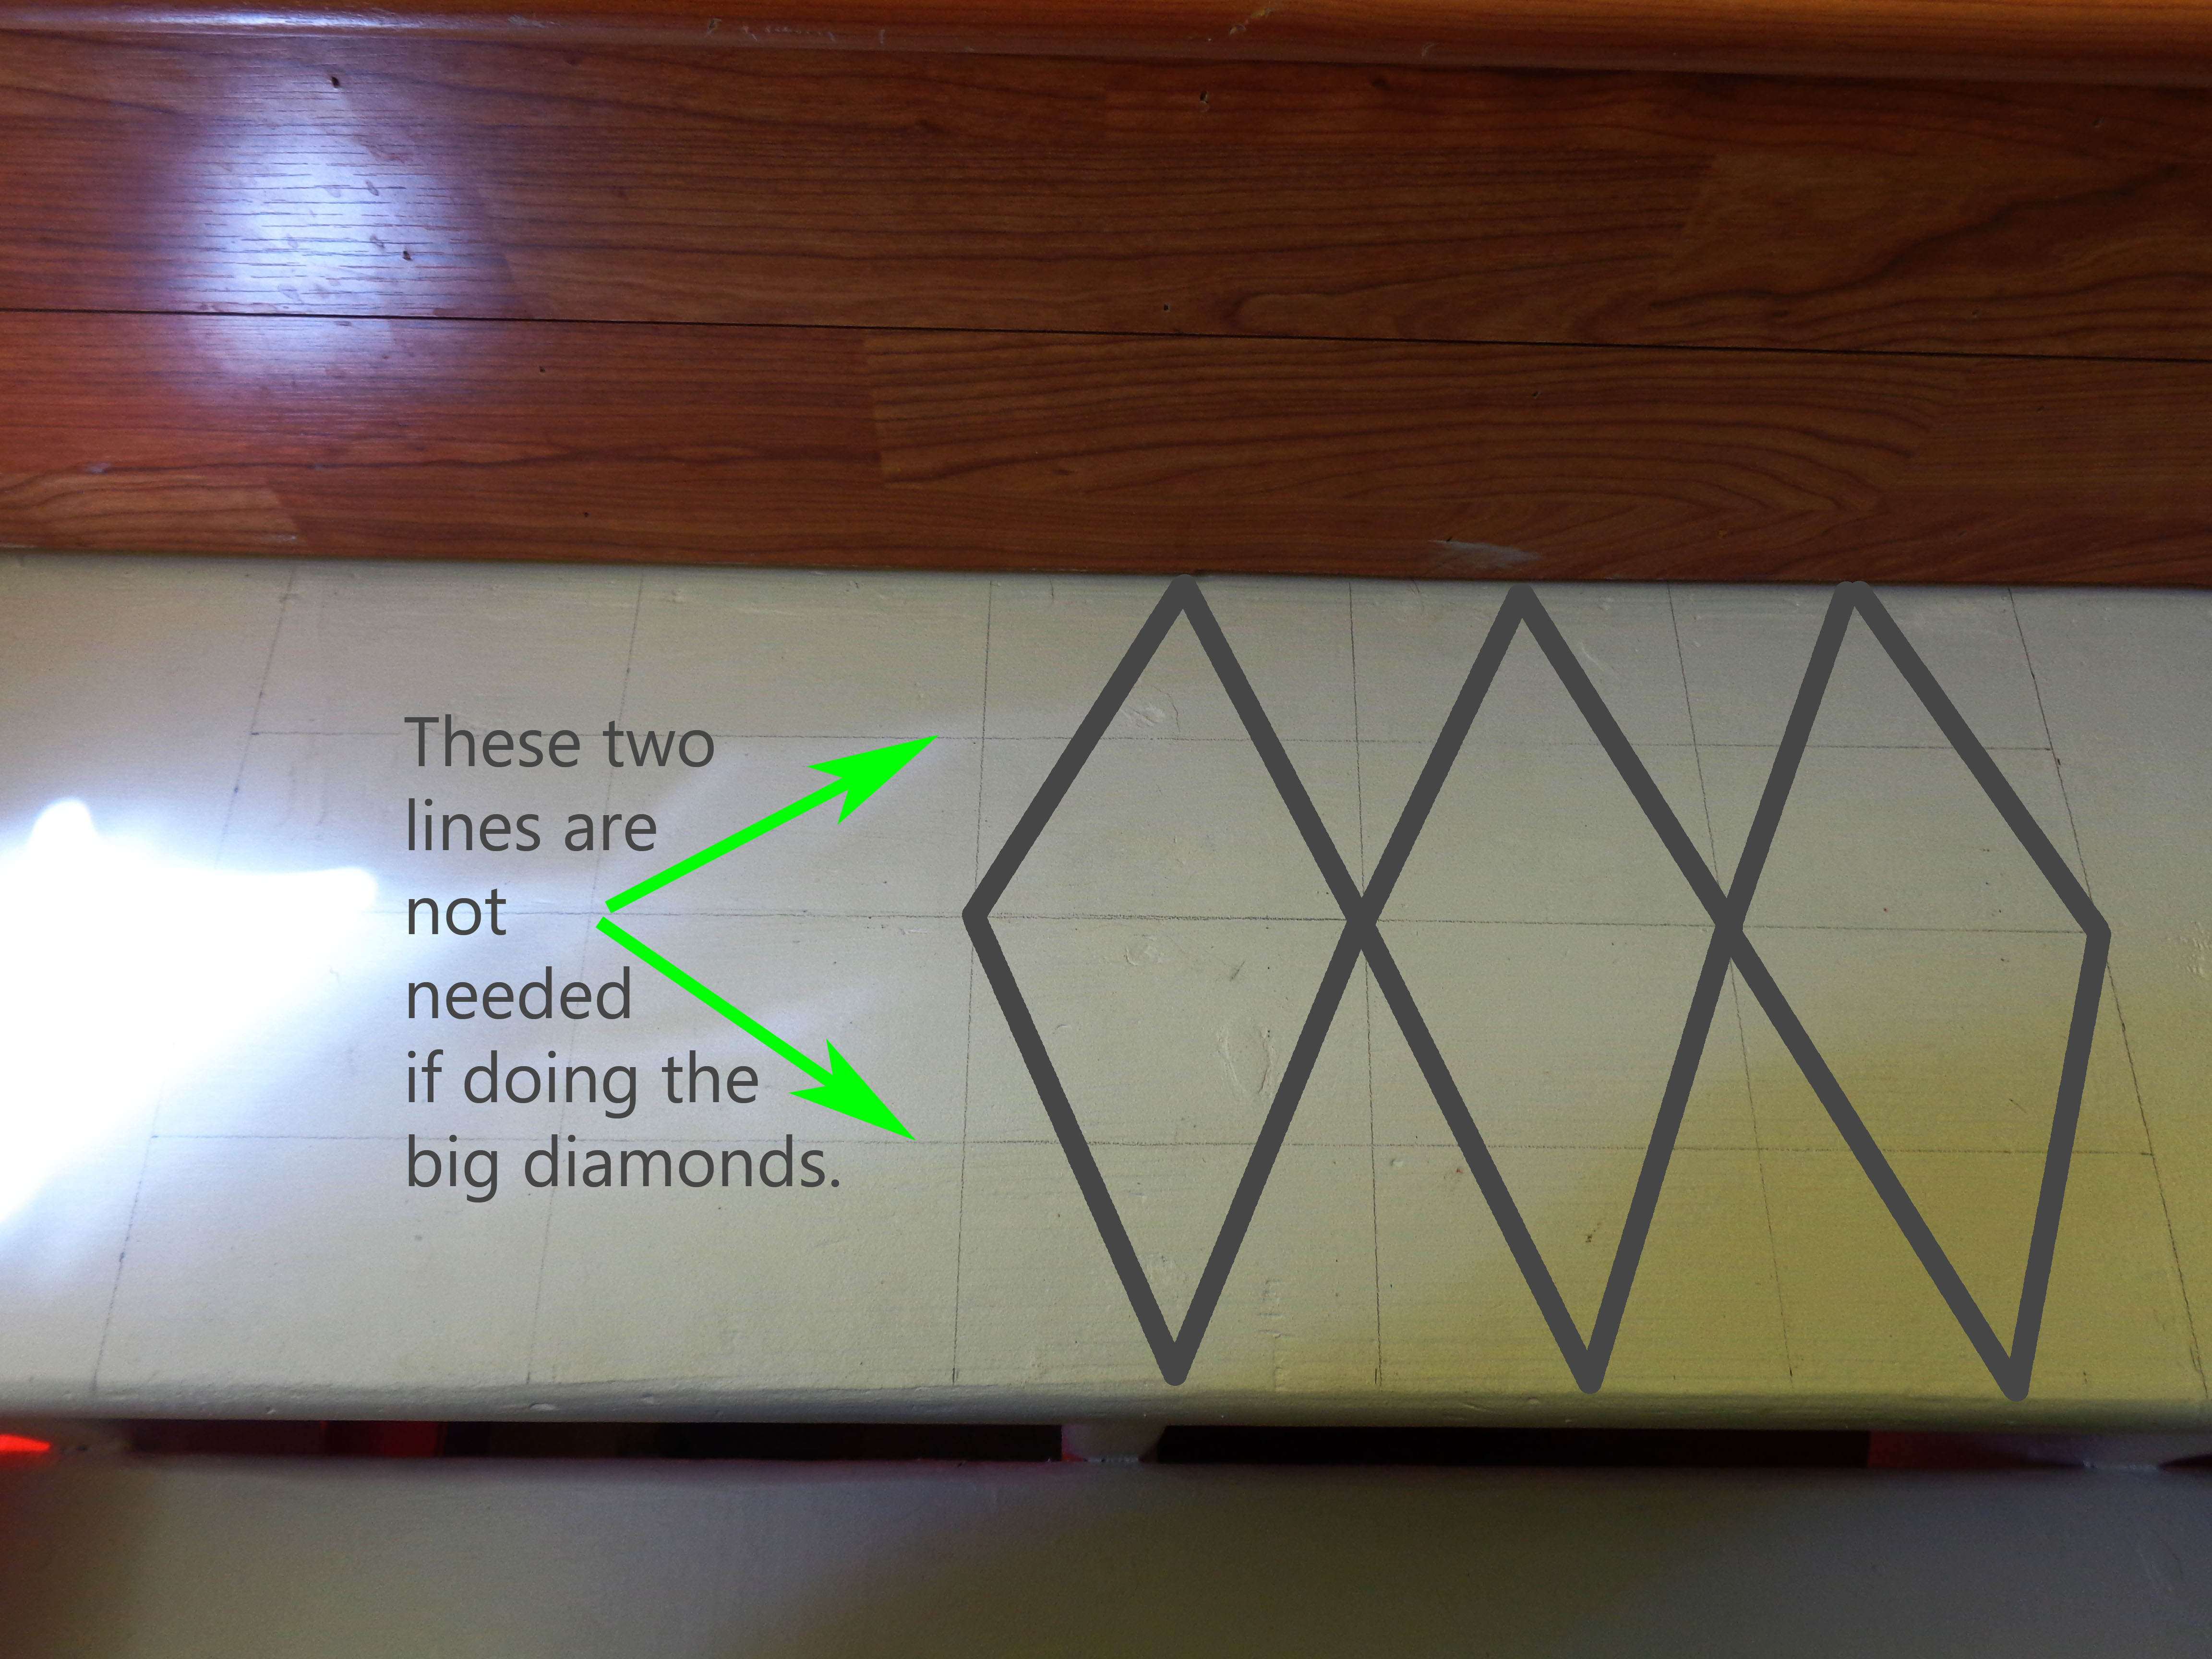
I had decided on having 5 diamonds go across the stair step, but was undecided on whether or not the diamonds should be 2 high, or just 1 high. To better visualize the impact of both, I taped half the stair off in large diamonds (1 high) and half the stair off in small diamonds (2 high)
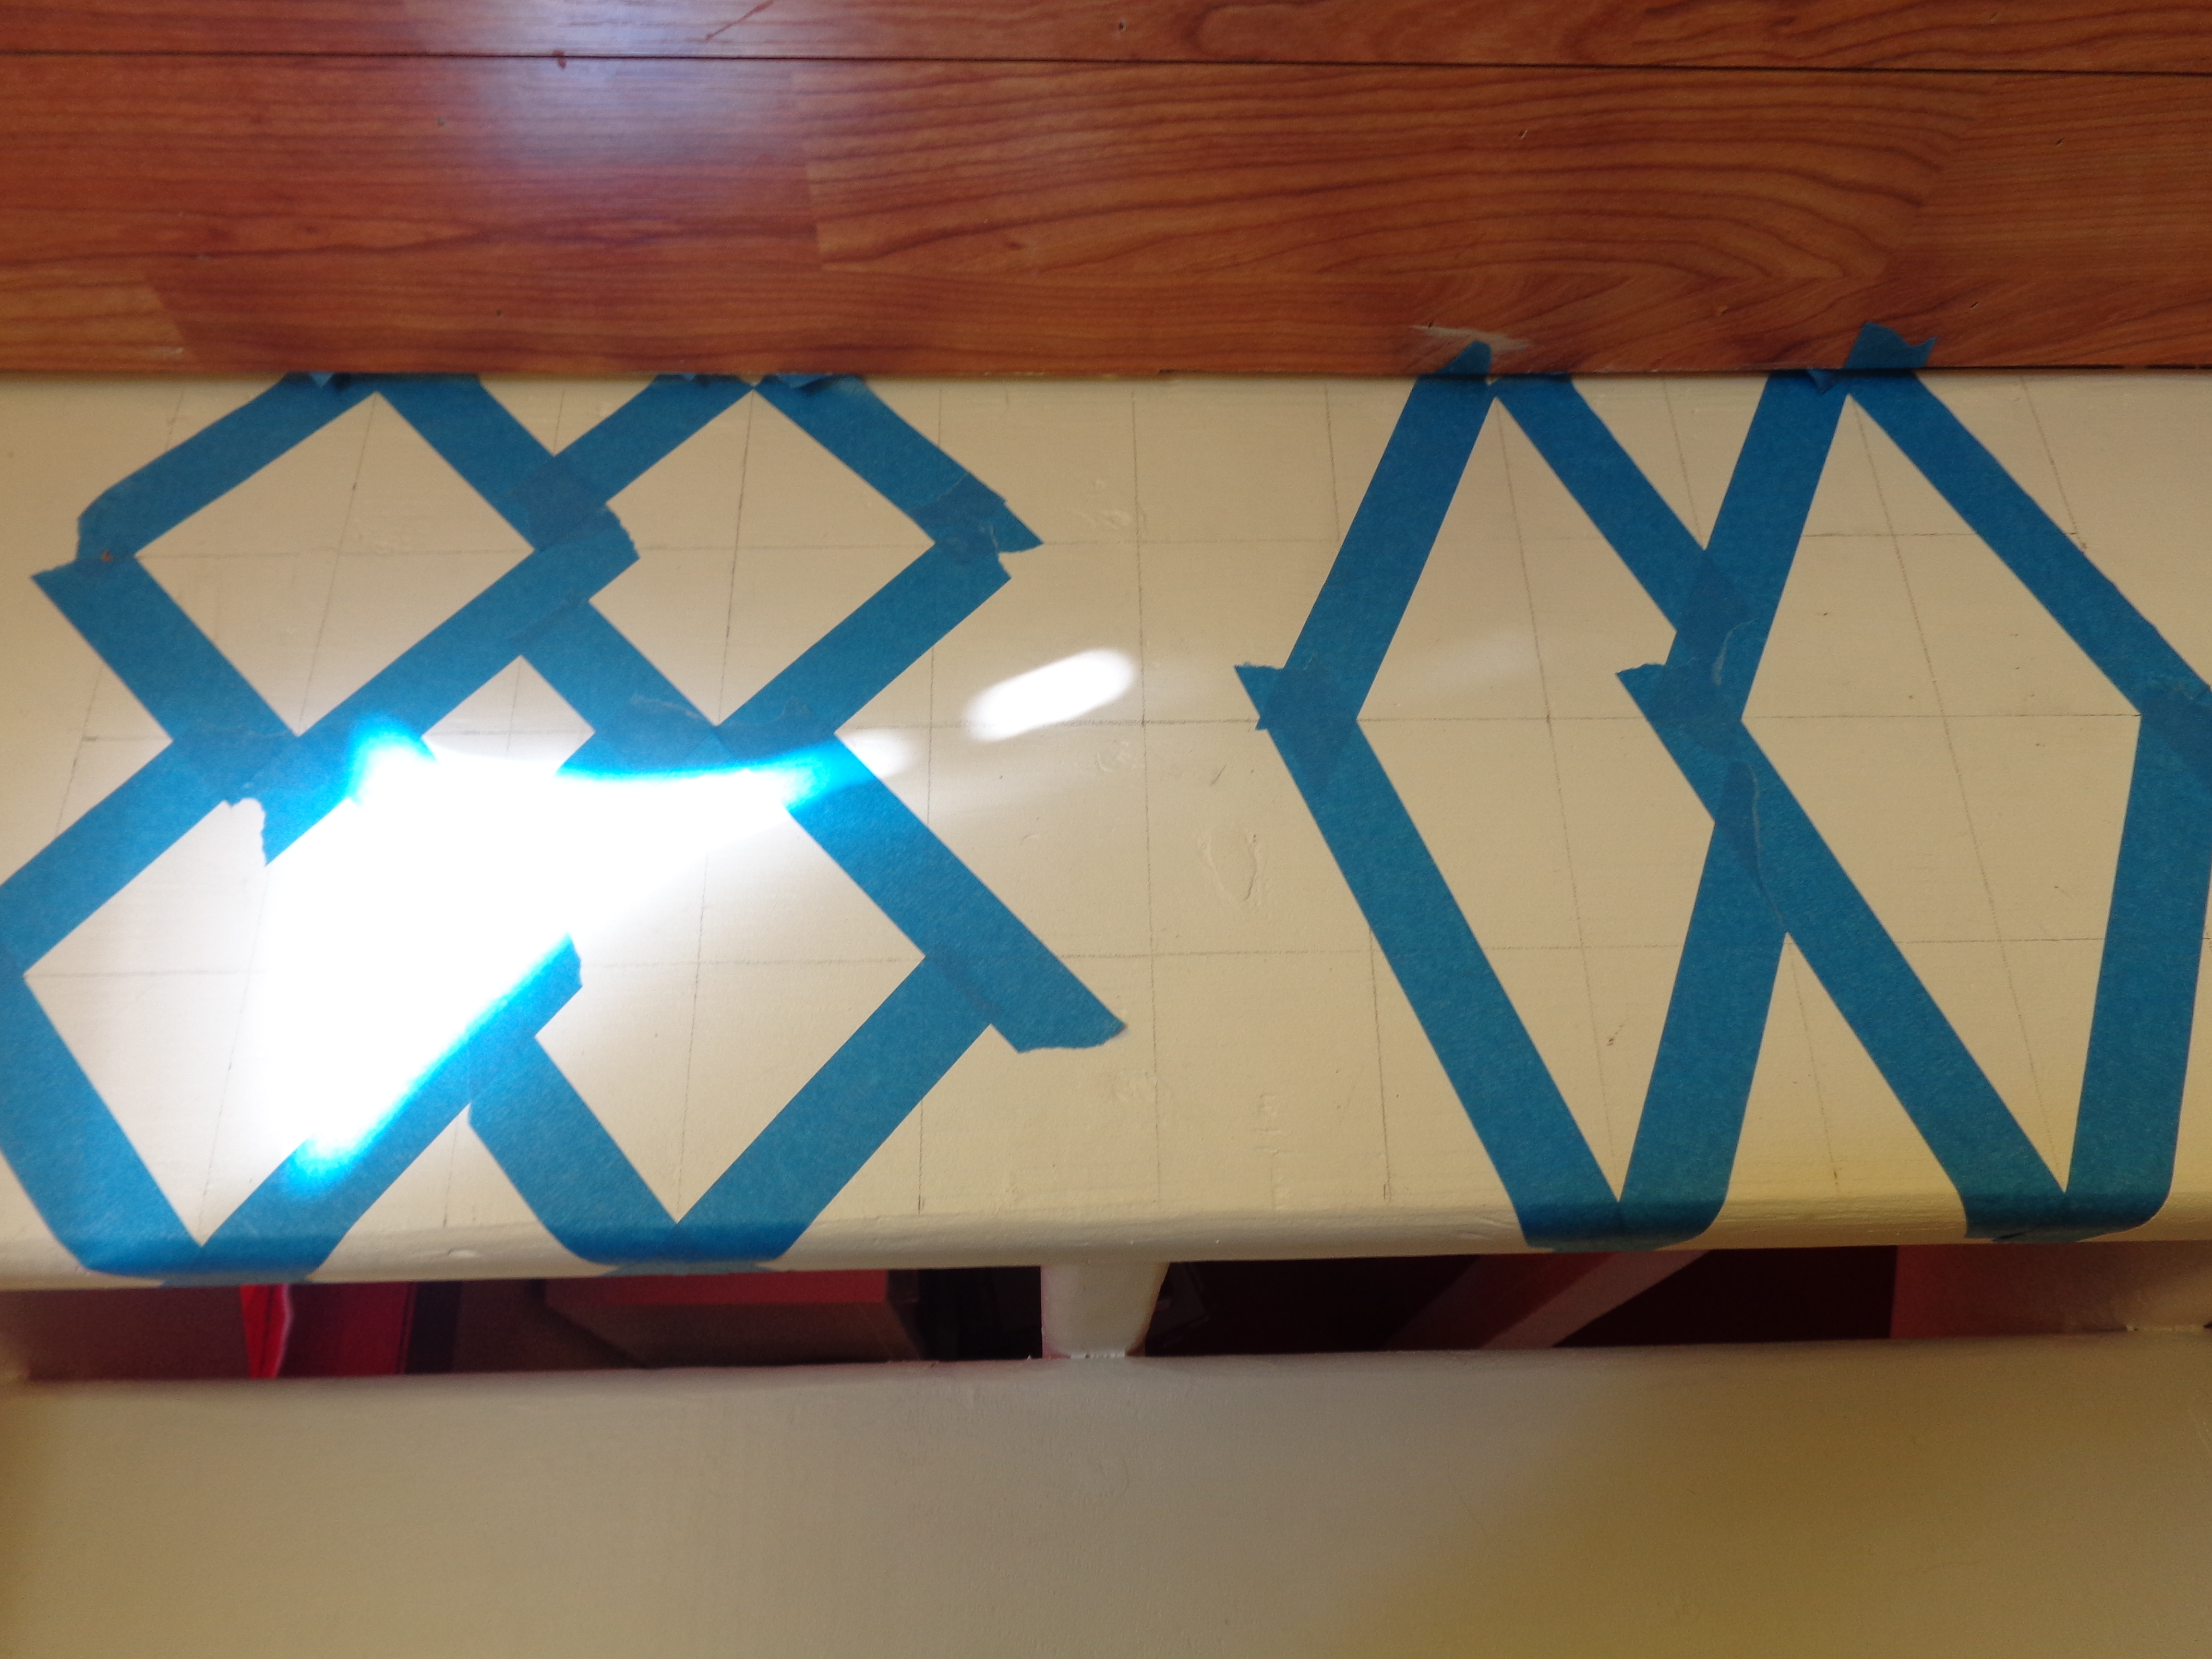
.
I liked the added pattern that the small diamonds made, but I liked the elongated shape of the larger diamonds. I decided to go with the larger diamonds because of 2 reasons:
1.) All the stairs together would create quite a lot of pattern.
2.) It would take less tape and time to do the larger ones.
So I got tape-happy and went to town on those stair steps!

.
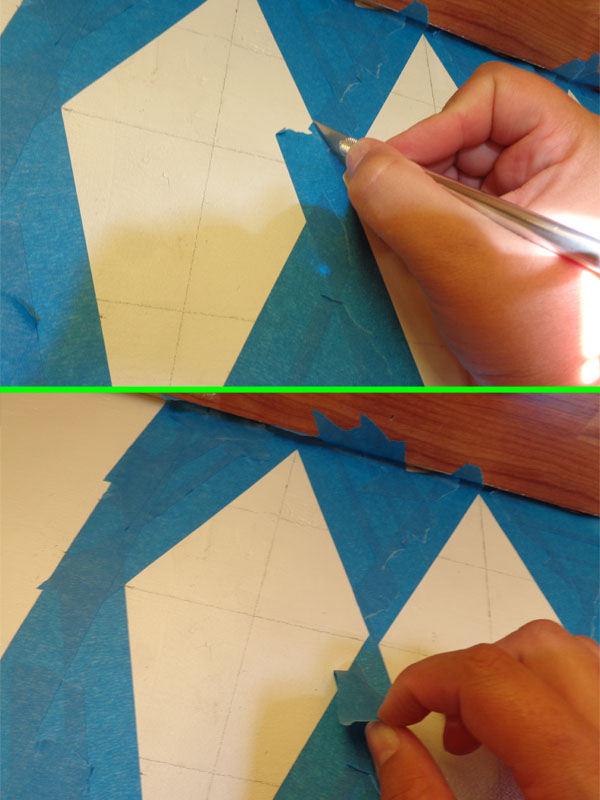
As you can see, from the picture above, some of the tape overlapped the angles where the diamonds meet across the middle of the stair step. To fix that, I got out my exacto knife and sliced away the excess tape. It was actually really easy!

.
I got 3 steps done and decided to take a break and write this post. Then I worked on this post for a while and decided to take a break and do another stair step. So as I am typing, right now, there are 4 stair steps taped off and 7 more to go. The first step took quite a while (like over an hour!) because I had to figure out exactly what was going to happen, but the subsequent steps are taking about 25 minutes a piece. That means I have about 3 and 1/2 more hours of work ahead of me to get all of them taped.
*******SIGH*******
(hang on a minute, now I am going to go take a break from everything and cry in the corner for a bit) :*(
.
OK, I am better now! 😀
.


.
It may take me a while, but the taping will be finished by the end of today! Painting starts tomorrow! Mark my words, ASML family, it WILL be done! (picture me standing on a soapbox with the American flag waving behind me, well dressed (think Jackie O.), and with my head tilted slightly, looking off into the distance)
.
Anyway, I must get off this computer and get back to taping.
I think that I will have dreams tonight of being bound up in blue tape. Or maybe that a giant blue tape monster is chasing me with its sticky arms reaching out for me!
Home improvement can be scary stuff, folks, scary stuff.
.
LIVE SIMPLY AND CHANGE THE WORLD!!
